Docker-安装-Nginx-容器部署前端项目

目录
Docker 安装 Nginx 容器部署前端项目
先安装docker
安装Nginx镜像
1、拉去取Nginx镜像
docker pull nginx	下载最新版Nginx镜像 (其实此命令就等同于 : docker pull nginx:latest )
docker pull nginx:xxx	下载指定版本的Nginx镜像 (xxx指具体版本号)
我们拉去1.24.0的nginx镜像
docker pull nginx:1.24.02、查看镜像
docker images查看镜像

3、创建Nginx配置文件
- 启动前需要先创建Nginx外部挂载的配置文件/home/nginx/conf/nginx.conf
- 之所以要先创建 , 是因为Nginx本身容器只存在/etc/nginx 目录 , 本身就不创建 nginx.conf 文件
- 当服务器和容器都不存在 nginx.conf 文件时, 执行启动命令的时候 docker会将nginx.conf 作为目录创建
4、创建挂载目录
# 创建挂载目录
mkdir -p /home/nginx/conf
mkdir -p /home/nginx/log
mkdir -p /home/nginx/html
容器中的nginx.conf文件和conf.d文件夹复制到宿主机
5、先生成容器并把nginx对应配置放入本地文件夹一份
# 生成容器
docker run --name nginx -p 80:80 -d nginx:1.24.0
# 将容器nginx.conf文件复制到宿主机
docker cp nginx:/etc/nginx/nginx.conf /home/nginx/conf/nginx.conf
# 将容器conf.d文件夹下内容复制到宿主机
docker cp nginx:/etc/nginx/conf.d /home/nginx/conf/conf.d
# 将容器中的html文件夹复制到宿主机
docker cp nginx:/usr/share/nginx/html /home/nginx/
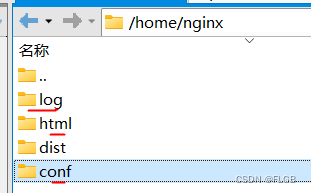
到对应目录下查看文件已经存在了(划红线的)
6、重新创建Nginx容器并运行
# 直接执行docker rm nginx或者以容器id方式关闭容器
# 找到nginx对应的容器id
docker ps -a

# 关闭该容器
docker stop nginx
# 删除该容器
docker rm nginx

# 删除正在运行的nginx容器
docker rm -f nginx

# 重新加载配置文件
docker exec 容器id nginx -s reload
删除成功后,重新生成容器并进行目录挂载映射
docker run \
-p 80:80 \
--name nginx \
-v /home/nginx/conf/nginx.conf:/etc/nginx/nginx.conf \
-v /home/nginx/conf/conf.d:/etc/nginx/conf.d \
-v /home/nginx/log:/var/log/nginx \
-v /home/nginx/html:/usr/share/nginx/html \
-d nginx:1.24.0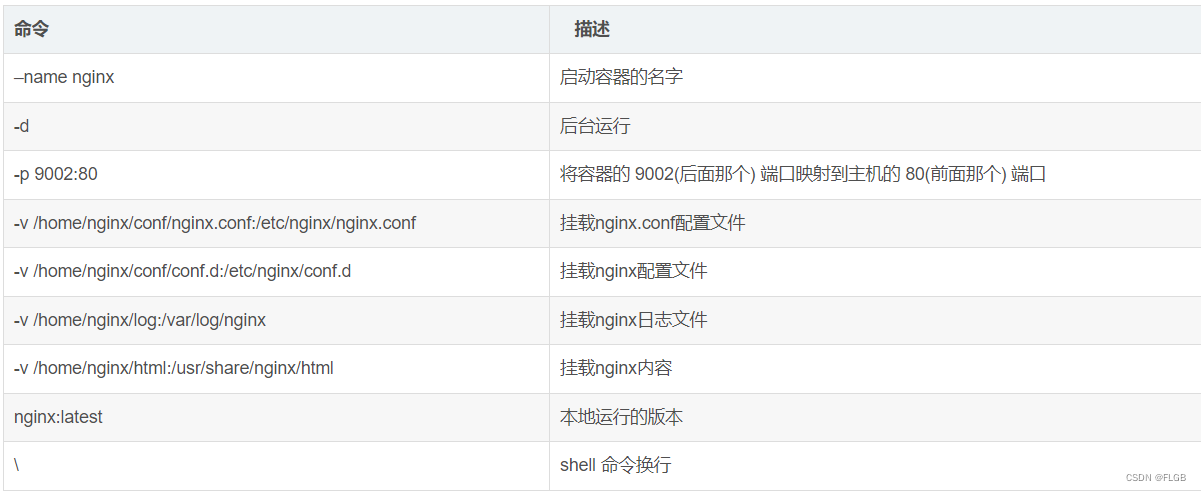
注意
-p 80:80有个坑,部署的时候后面详说
7、测试
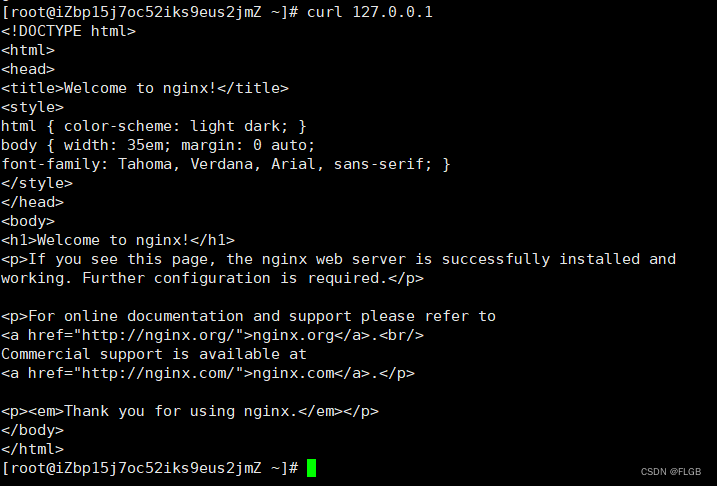
内部curl一下
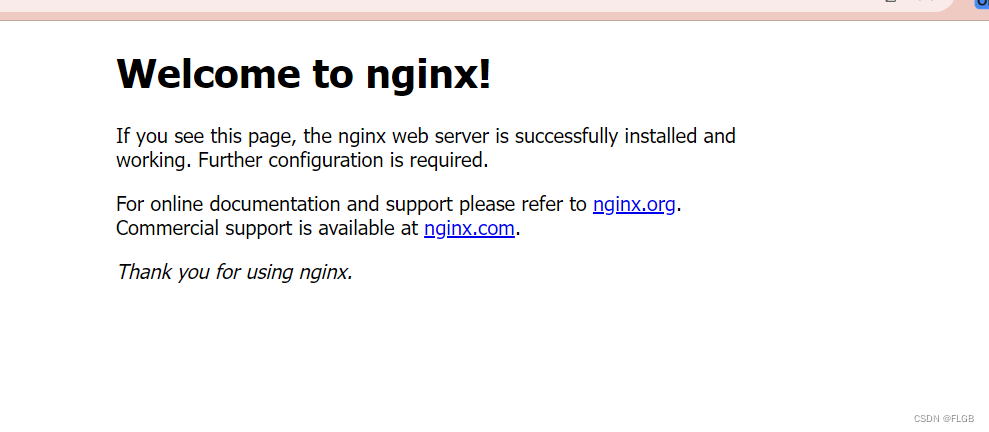
外部使用外网ip访问
部署前端项目
1、配置nginx server监听
在对应挂在目录下创建监听文件
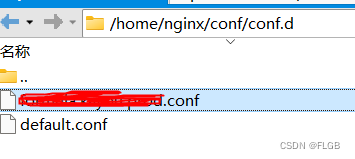
配置:
server
{
    listen 6087;
    location / {
       #网站主页路径。此路径仅供参考,具体请您按照实际目录操作。
       #例如,您的网站运行目录在/etc/www下,则填写/etc/www。
       #允许跨域请求的域,* 代表所有
       add_header 'Access-Control-Allow-Origin' *;
       #允许带上cookie请求
       add_header 'Access-Control-Allow-Credentials' 'true';
       #允许请求的方法,比如 GET/POST/PUT/DELETE
       add_header 'Access-Control-Allow-Methods' *;
       #允许请求的header
       add_header 'Access-Control-Allow-Headers' *;

       root /data/java/formula-vue/dist;
	   try_files $uri $uri/ /index.html;
       index index.html index.htm;
    }
    location /stage-api/ {
        proxy_read_timeout 200000s;
        proxy_set_header Host $http_host;
        proxy_set_header X-Real-IP $remote_addr;
        proxy_set_header REMOTE-HOST $remote_addr;
        proxy_set_header X-Forwarded-For 	  $proxy_add_x_forwarded_for;
        proxy_pass http://localhost:6088/;
    }

}
/data/java/formula-vue/dist vue项目目录
proxy_read_timeout 200s; 里面有耗时大请求
proxy_pass http://localhost:6088/;代理到后端请求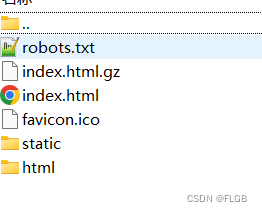
第一个坑
docker运行nginx镜像时,设置端口映射,则只有该映射端口起作用,nginx配置的其他端口无效
所以想要多个端口起效果,启动时要用–net host (先删除容器后重新生成)
docker run --net host  --name nginx --restart always  \
-v /home/nginx/conf/nginx.conf:/etc/nginx/nginx.conf \
-v /home/nginx/conf/conf.d:/etc/nginx/conf.d \
-v /home/nginx/log:/var/log/nginx \
-v /home/nginx/html:/usr/share/nginx/html \
-d nginx:1.24.0
第二个坑
访问报了 rewrite or internal redirection cycle while internally redirecting to “//index.html/index.html/index.html/index.html/index.html/index.html/index.html/index.html/index.html/index.html/index.html”
*1 rewrite or internal redirection cycle while internally redirecting to "//index.html/index.html/index.html/index.html/index.html/index.html/index.html/index.html/index.html/index.html/index.html", docker下的nginx只能读到挂载路径下面的文件( 这和软件安装的Nginx不同,有时候照着copy还是会出现问题 ),所以 将编译好的前端项目文件夹复制到nginx挂载的路径下 ,并且修改配置文件中的root路径,再次访问成功加载首页
**把dist重新上传到挂在路径/usr/share/nginx/html/下
并修改nginx项目conf 配置如下**
server
{
    listen 6087;
    location / {
       #网站主页路径。此路径仅供参考,具体请您按照实际目录操作。
       #例如,您的网站运行目录在/etc/www下,则填写/etc/www。
       #允许跨域请求的域,* 代表所有
       add_header 'Access-Control-Allow-Origin' *;
       #允许带上cookie请求
       add_header 'Access-Control-Allow-Credentials' 'true';
       #允许请求的方法,比如 GET/POST/PUT/DELETE
       add_header 'Access-Control-Allow-Methods' *;
       #允许请求的header
       add_header 'Access-Control-Allow-Headers' *;
       root /usr/share/nginx/html/dist;
       index index.html index.htm;
	   try_files $uri $uri/ /index.html;
    }
    location /stage-api/ {
         proxy_read_timeout 200000s;
        proxy_set_header Host $http_host;
        proxy_set_header X-Real-IP $remote_addr;
        proxy_set_header REMOTE-HOST $remote_addr;
        proxy_set_header X-Forwarded-For $proxy_add_x_forwarded_for;
        proxy_pass http://localhost:6088/;
    }
}
重新加载配置文件
# 重新加载配置文件
docker exec 容器id nginx -s reload
重新访问http://ip:6087/成功跳转到首页