基于STM32F407的FreeRTOS系统

基于STM32F407的FreeRTOS系统
为什么要在单片机中使用实时多任务操作系统
该视频在113分10秒之后,讲了实时操作系统的使用价值。老师讲得非常好,我就不过多赘述了。(这整个视频都值得看一下)
简单讲述一下FreeRTOS的原理
多任务
内核是操作系统的核心部分,操作系统例如Linux通过内核使用户看似同时的访问电脑,多个用户看似同时的执行多个任务。每一个执行的程序是操作系统控制的一个任务,如果一个操作系统可以执行多个任务,则被称为多任务操作系统。
多任务操作系统可以简化复杂的软件应用。
一个常规的处理器只能在某一时刻执行一个任务,但是多任务操作系统通过快速的任务切换,可以让多个任务看起来是并发执行,如下

调度原理
调用度是内核中负责决定在某一时刻该执行什么任务的部分。内核可以挂起然后恢复一个任务许多次在任务的生命周期内。调度策略是调度器用于决定在某一时刻,该执行哪一任务的算法。另外,任务除了被内核挂起外,也可以自己挂起,比如延时一个时间,或者等待资源可用等。

Referring to the numbers in the diagram above:
At (1) task 1 is executing.
At (2) the kernel suspends (swaps out) task 1 …
… and at (3) resumes task 2.
While task 2 is executing (4), it locks a processor peripheral for its own exclusive access.
At (5) the kernel suspends task 2 …
… and at (6) resumes task 3.
Task 3 tries to access the same processor peripheral, finding it locked task 3 cannot continue so suspends itself at (7).
At (8) the kernel resumes task 1.
Etc.
The next time task 2 is executing (9) it finishes with the processor peripheral and unlocks it.
The next time task 3 is executing (10) it finds it can now access the processor peripheral and this time executes until suspended by the kernel.
上下文切换
一个任务运行时,它使用处理器/微控制器和访问RAM和ROM,就是其他的程序一样,这些资源(处理器寄存器,栈等)共同组成了任务的执行环境。

任务是一段代码片段,它不知道什么时候被内核挂起和恢复,甚至不知道发生了这些事件。在任务挂起时保存任务的上下文,恢复任务后,操作系统内核将在执行之前恢复其保存的上下文。 保存挂起的任务的上下文并恢复任务的上下文的过程称为上下文切换。
通过STM32CubeMX使用FreeRTOS系统
软件版本
- STM32CubeMX 5.5.0
- Keil MDK 526
实际操作
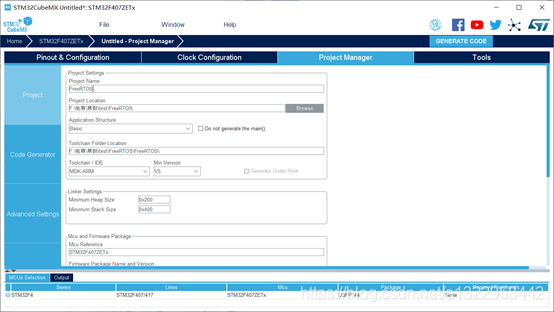
新建工程

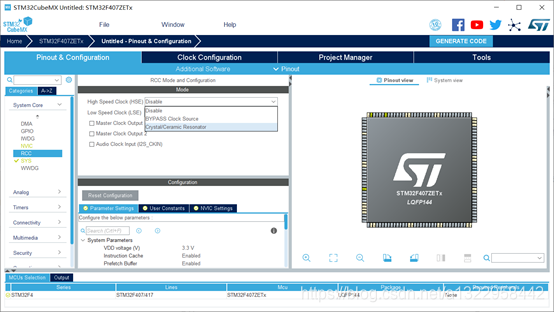
芯片型号为STM32F407ZE

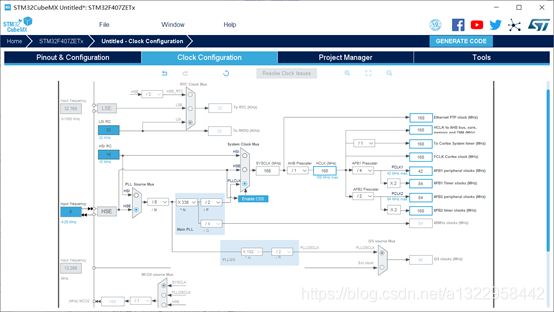
时钟配置


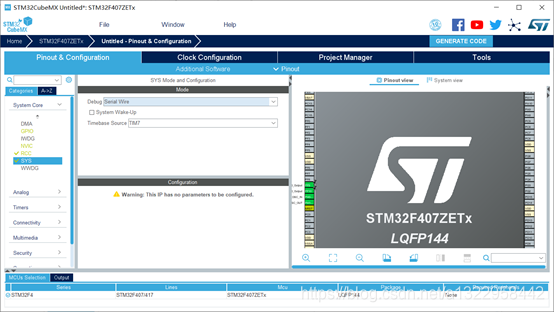
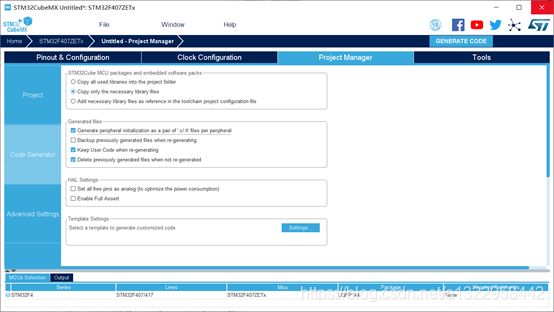
工程配置


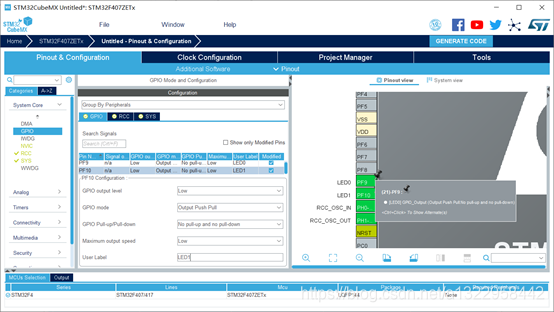
使能外设(两个GPIO口,分别控制两个LED灯)

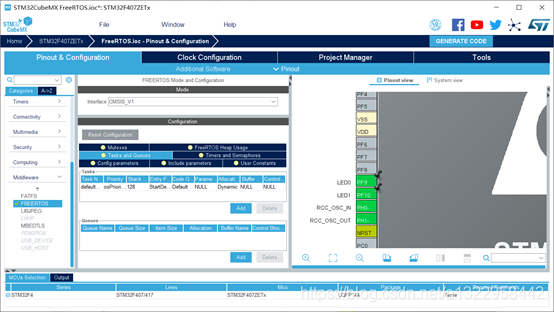
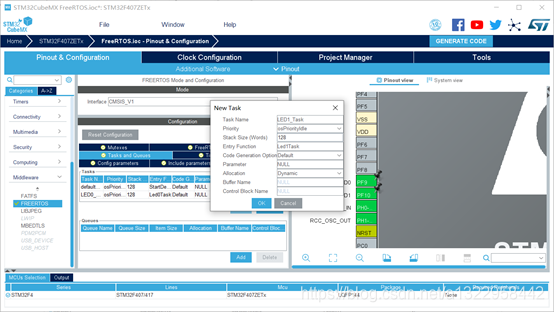
配置FreeRTOS任务
点FREERTOS,点Task and Queues
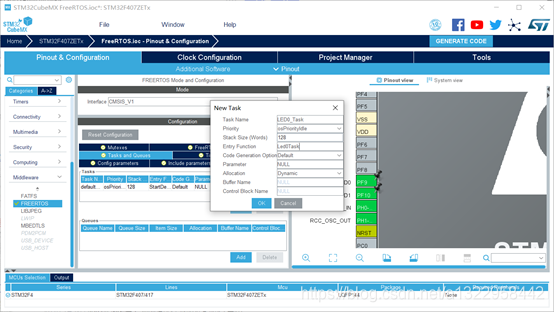
在Tasks区域内,点add,添加任务
如下图,添加LED0任务和LED1任务


生成代码,编写任务函数
LED_Task.h文件#ifndef LED_TASK_H #define LED_TASK_H void LED0_Task(void); // LED0(PF9 )闪烁 void LED1_Task(void); // LED1(PF10)闪烁 #endifLED_Task.c文件#include "LED_Task.h" #include "main.h" #define ON_State GPIO_PIN_RESET //根据硬件原理图 低电平为亮,高电平为灭 #define OFF_State GPIO_PIN_SET void LED0_Task(void) { static GPIO_PinState LED0_State = OFF_State; //静态变量 LED0_State = (LED0_State == ON_State) ? OFF_State:ON_State; HAL_GPIO_WritePin(GPIOF, LED0_Pin, LED0_State); } void LED1_Task(void) { static GPIO_PinState LED1_State = OFF_State; //静态变量 LED1_State = (LED1_State == ON_State) ? OFF_State:ON_State; HAL_GPIO_WritePin(GPIOF, LED1_Pin, LED1_State); }在freertos.c文件中,引入LED_Task.h头文件,在两个任务调度函数中分别加入自己想要添加的任务,设置好任务阻塞的时间(osDelay(1)为1ms),可以大致认为是运行该任务的频率。
/* USER CODE BEGIN Header_Led0Task */
/**
* @brief Function implementing the LED0_Task thread.
* @param argument: Not used
* @retval None
*/
/* USER CODE END Header_Led0Task */
void Led0Task(void const * argument)
{
  /* USER CODE BEGIN Led0Task */
  /* Infinite loop */
  for(;;)
  {
	LED0_Task();
    osDelay(500);
  }
  /* USER CODE END Led0Task */
}

/* USER CODE BEGIN Header_Led1Task */
/**
* @brief Function implementing the LED1_Task thread.
* @param argument: Not used
* @retval None
*/
/* USER CODE END Header_Led1Task */
void Led1Task(void const * argument)
{
  /* USER CODE BEGIN Led1Task */
  /* Infinite loop */
  for(;;)
  {
	LED1_Task();
    osDelay(1000);
  }
  /* USER CODE END Led1Task */
}
最终效果是,LED0(PF9)每0.5秒切换一下状态,LED1(PF10)每1秒切换一下状态。两个任务“互不影响”地同时进行。


