目录

Prometheus自动化监控-自动监控上百台服务器

Prometheus自动化监控-自动监控上百台服务器

如何自动化监控几百台服务器思路

老办法:
	1.要在这100台服务器安装node_exporter。
	2.在prometheus配置增加这100台机器配置。

自动化运维:
	1.ansible批量部署node_exporter
	2.基于consul的服务发现
	3.将node_exporter所在及其的IP和端口注册到consul里。
	4.prometheus从consul里获取所有IP和端口自动加入监控。

这几百台服务器中有:

Web服务器、DB服务器、负载均衡服务器、消息队列服务器。

实际运维过程中也是按照分组管理

"id": "web1","name": "webserver组","address": "xxxx"
"id": "web2","name": "webserver组","address": "xxxx"
"id": "web3","name": "webserver组","address": "xxxx"

"id": "db1","name": "dbserver组","address": "xxxx"
"id": "db2","name": "dbserver组","address": "xxxx"
"id": "db3","name": "dbserver组","address": "xxxx"

实现自动化监控几百台服务器

prometheus服务上安装Ansible

安装epel源
yum install epel-release -y

安装Ansible
yum install ansible -y

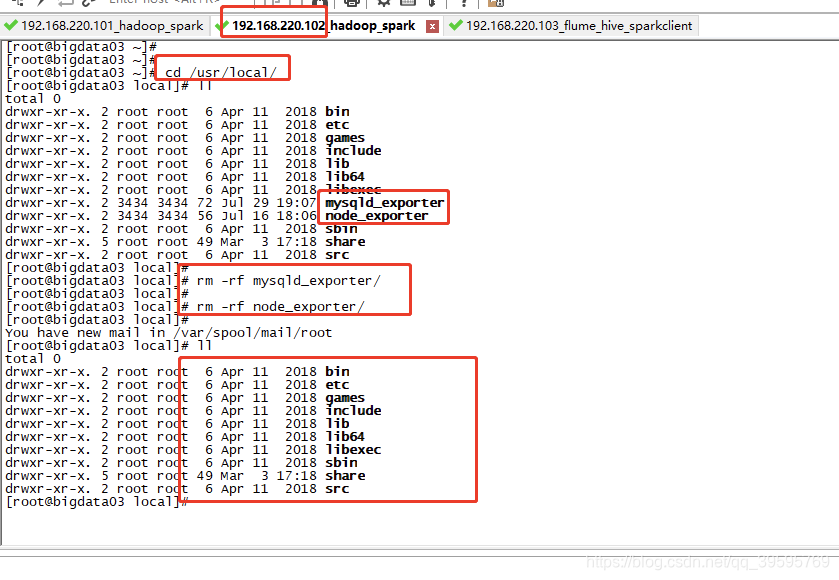
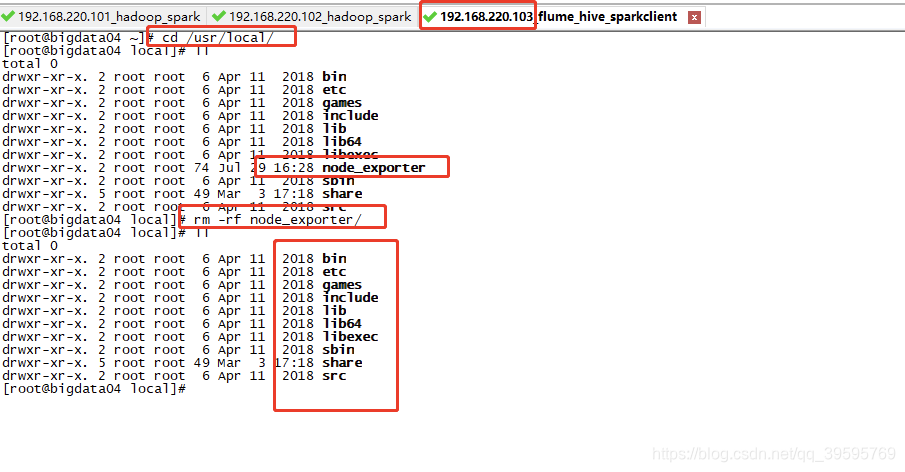
把安装了exporter的服务器的node_exporter文件夹都清空:

https://i-blog.csdnimg.cn/blog_migrate/a475fcb7ff5688f26aaba6830e1d3345.png

https://i-blog.csdnimg.cn/blog_migrate/db63eb1f3a000f2dd8be66113ac90f45.png

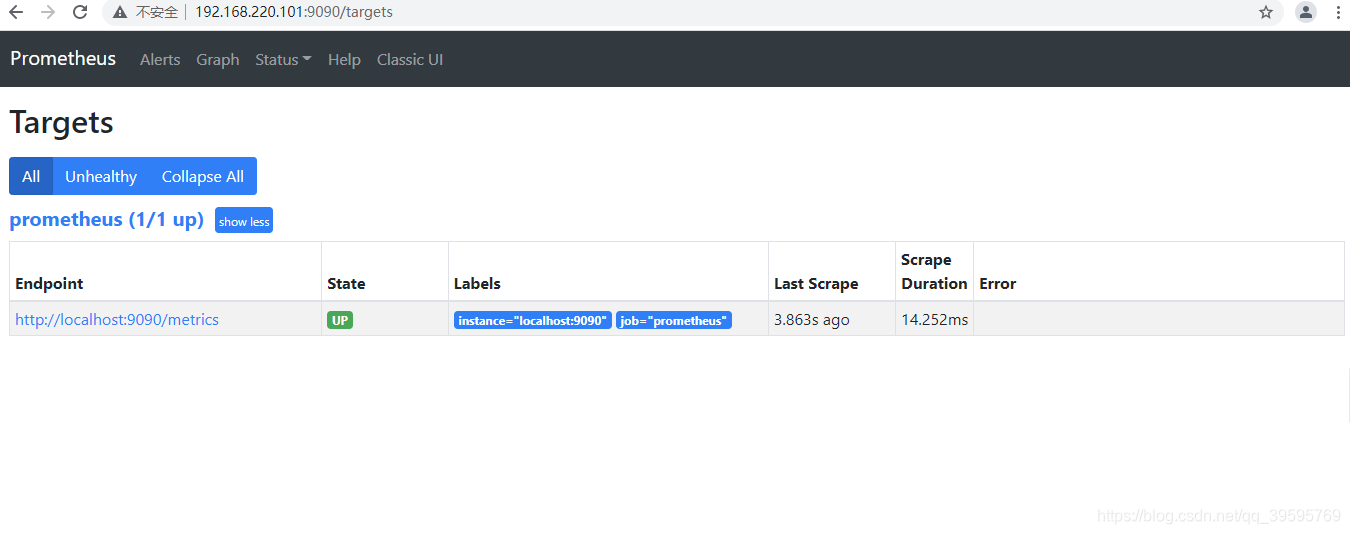
删掉之后可以看到prometheus中的target中的Endpoint都挂掉了
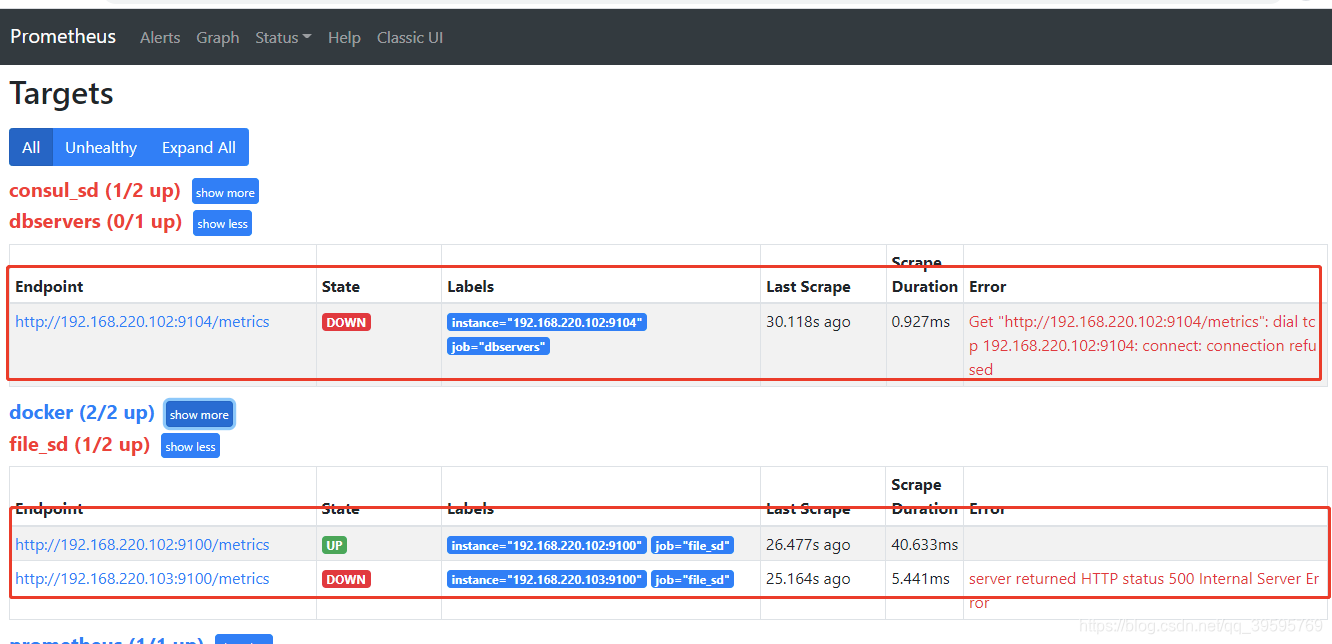
https://i-blog.csdnimg.cn/blog_migrate/7acca432752500648c6fca0b0544bc5b.png

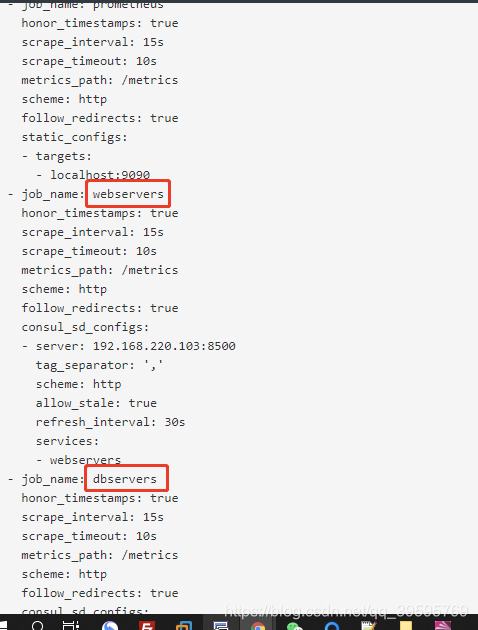
删掉prometheus配置文件中的配置,只保留consul的配置

可以备份以下,当做以后学习用:
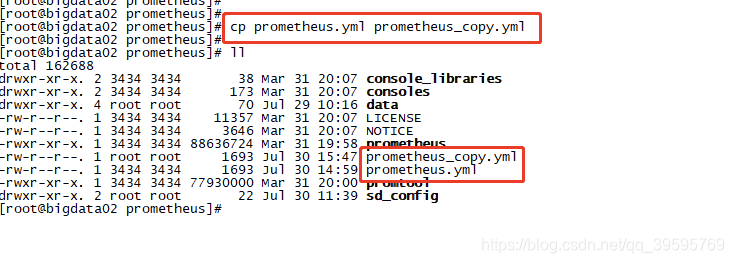
https://i-blog.csdnimg.cn/blog_migrate/92bbfb8450d122de63b75f82bc58660c.png

https://i-blog.csdnimg.cn/blog_migrate/d29273e04d84f4a910a0314953633e79.png

https://i-blog.csdnimg.cn/blog_migrate/95f8c0802dc6cca429810975f2a2c3d8.png

https://i-blog.csdnimg.cn/blog_migrate/225232429ad47ec3e05d43ae841707a6.png

https://i-blog.csdnimg.cn/blog_migrate/b4acd8a974505b8ed123475fa658db5f.png

https://i-blog.csdnimg.cn/blog_migrate/347325ee41a50f998f1e9ad4608f4373.png

https://i-blog.csdnimg.cn/blog_migrate/3d4e221352c4a1a270cb6055bb33b5f4.png

Ansible + playbook完成任务

https://i-blog.csdnimg.cn/blog_migrate/96a9b2877415018a70e26341bb2c4d05.png

https://i-blog.csdnimg.cn/blog_migrate/21856dc7b0072e26c53dd420e1ea37aa.png

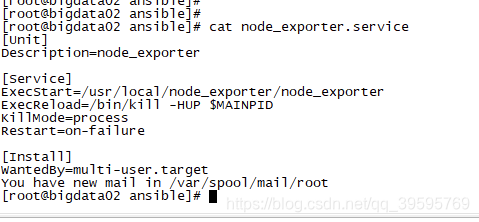
[Unit]
Description=node_exporter

[Service]
ExecStart=/usr/local/node_exporter/node_exporter
ExecReload=/bin/kill -HUP $MAINPID
KillMode=process
Restart=on-failure

[Install]
WantedBy=multi-user.target

https://i-blog.csdnimg.cn/blog_migrate/163ab751313115e09722d6463efe921e.png

https://i-blog.csdnimg.cn/blog_migrate/7407c95c2599e8a02b8811750c65d0d0.png

https://i-blog.csdnimg.cn/blog_migrate/f47064c485482c1b590a0aa4d28e5fae.png

https://i-blog.csdnimg.cn/blog_migrate/155d995947626ce70b26cf5e59ba153c.png

https://i-blog.csdnimg.cn/blog_migrate/b927201793d4b472a945685c9ba87ac7.png

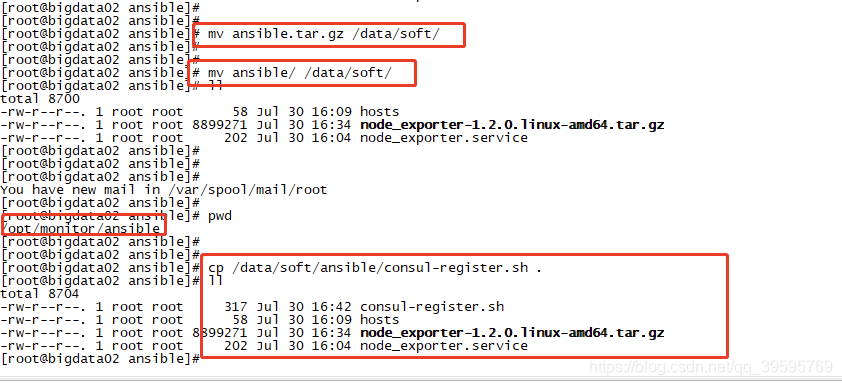
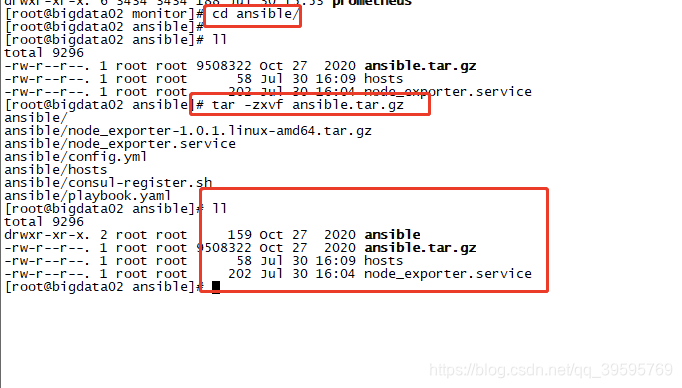
有了这四个文件后,就可以编写playbook了

consul-register.sh
hosts
node_exporter-1.2.0.linux-amd64.tar.gz
node_exporter.service
playbook.yaml

各文件的内容

consul-register.sh

#!/bin/bash
service_name=$1
instance_id=$2
ip=$3
port=$4

curl -X PUT -d '{"id": "'"$instance_id"'","name": "'"$service_name"'","address": "'"$ip"'","port": '"$port"',"tags": ["'"$service_name"'"],"checks": [{"http": "http://'"$ip"':'"$port"'","interval": "5s"}]}' http://192.168.220.103:8500/v1/agent/service/register

hosts

[webservers]
192.168.220.102 name=web1

[dbservers]
192.168.220.103 name=db1

node_exporter.service

[Unit]
Description=node_exporter

[Service]
ExecStart=/usr/local/node_exporter/node_exporter
ExecReload=/bin/kill -HUP $MAINPID
KillMode=process
Restart=on-failure

[Install]
WantedBy=multi-user.target
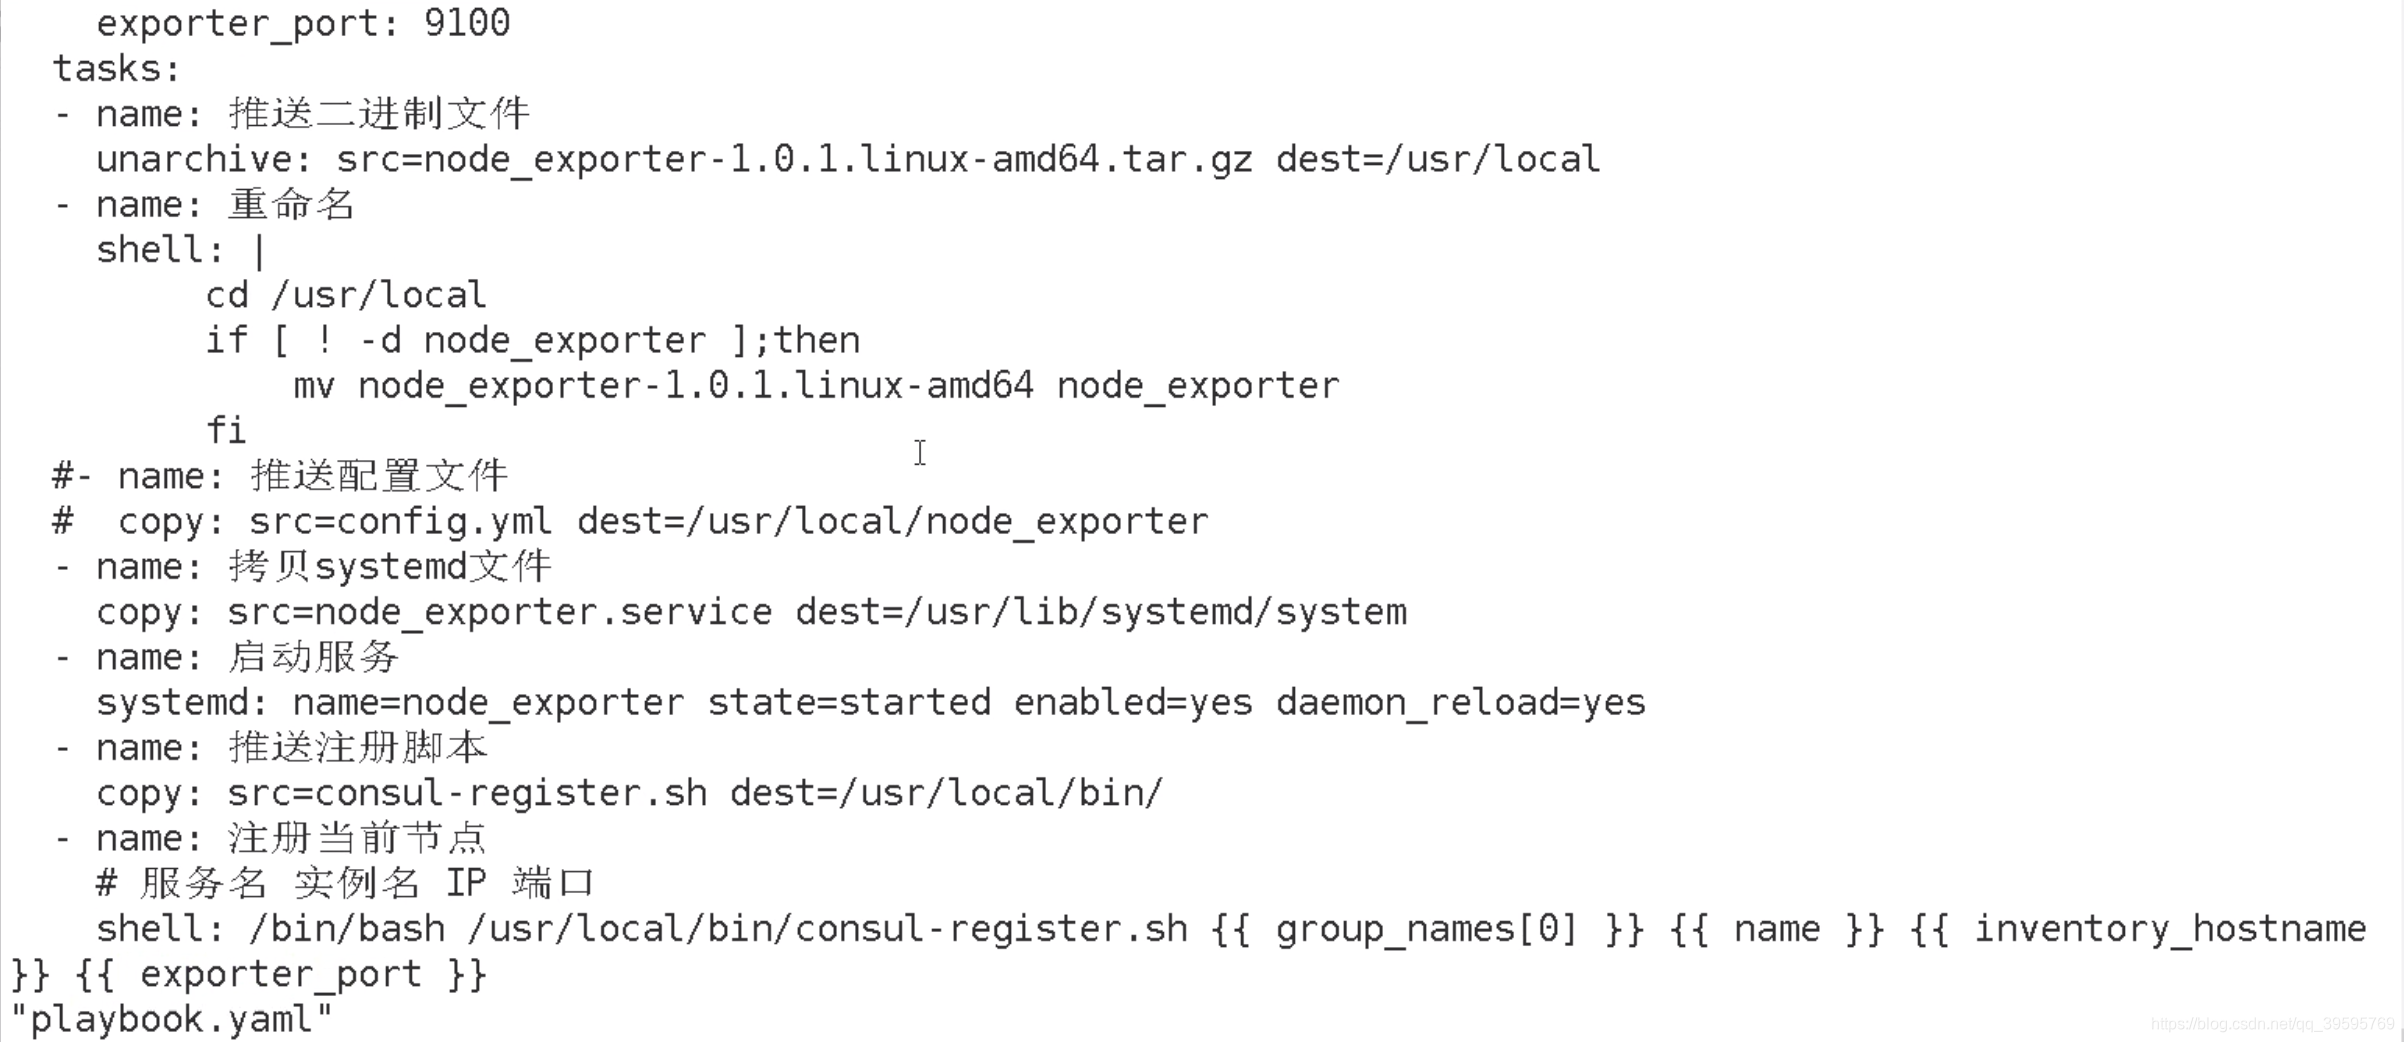
playbook.yaml

- hosts: webservers
  gather_facts: no
  vars:
    port: 9100
  tasks:
  - name: 推送二进制文件
    unarchive: src=node_exporter-1.2.0.linux-amd64.tar.gz dest=/usr/local
  - name: 重命名
    shell: |
         cd /usr/local
         if [ ! -d node_exporter ];then
             mv node_exporter-1.2.0.linux-amd64 node_exporter
         fi
 #- name: 推送配置文件
 #  copy: src=config.yml dest=/usr/local/node_exporter
  - name: 拷贝systemd文件
    copy: src=node_exporter.service dest=/usr/lib/systemd/system
  - name: 启动服务
    systemd: name=node_exporter state=started enabled=yes daemon_reload=yes
  - name: 推送注册脚本
    copy: src=consul-register.sh dest=/usr/local/bin/
  - name: 注册当前节点   
    # 服务名 实例名 IP 端口 
    shell: /bin/bash /usr/local/bin/consul-register.sh {{ group_names[0] }} {{ name }} {{ inventory_hostname }} {{ port }}

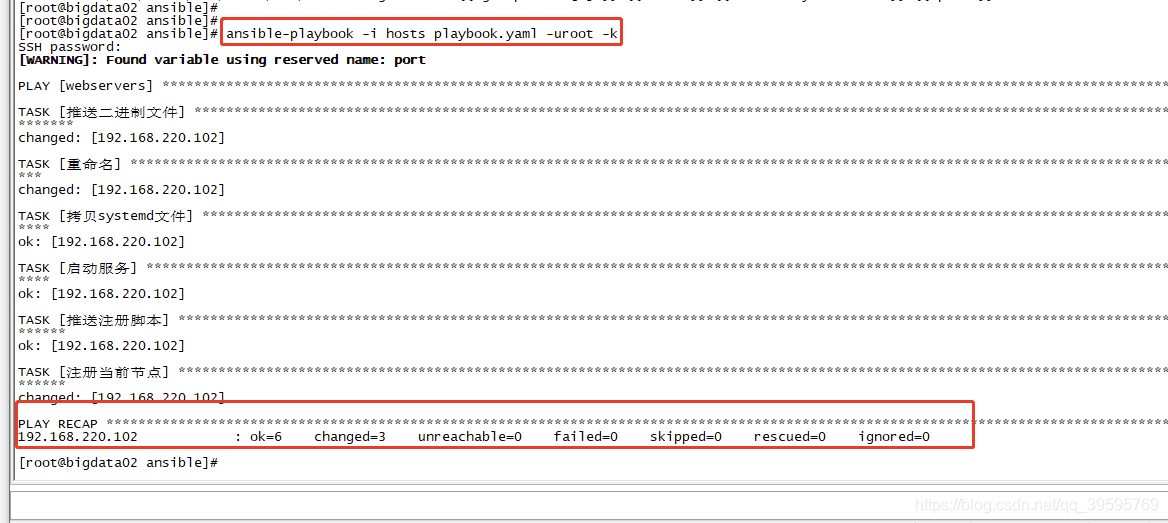
准备齐全,ansible部署exporter到其他服务器

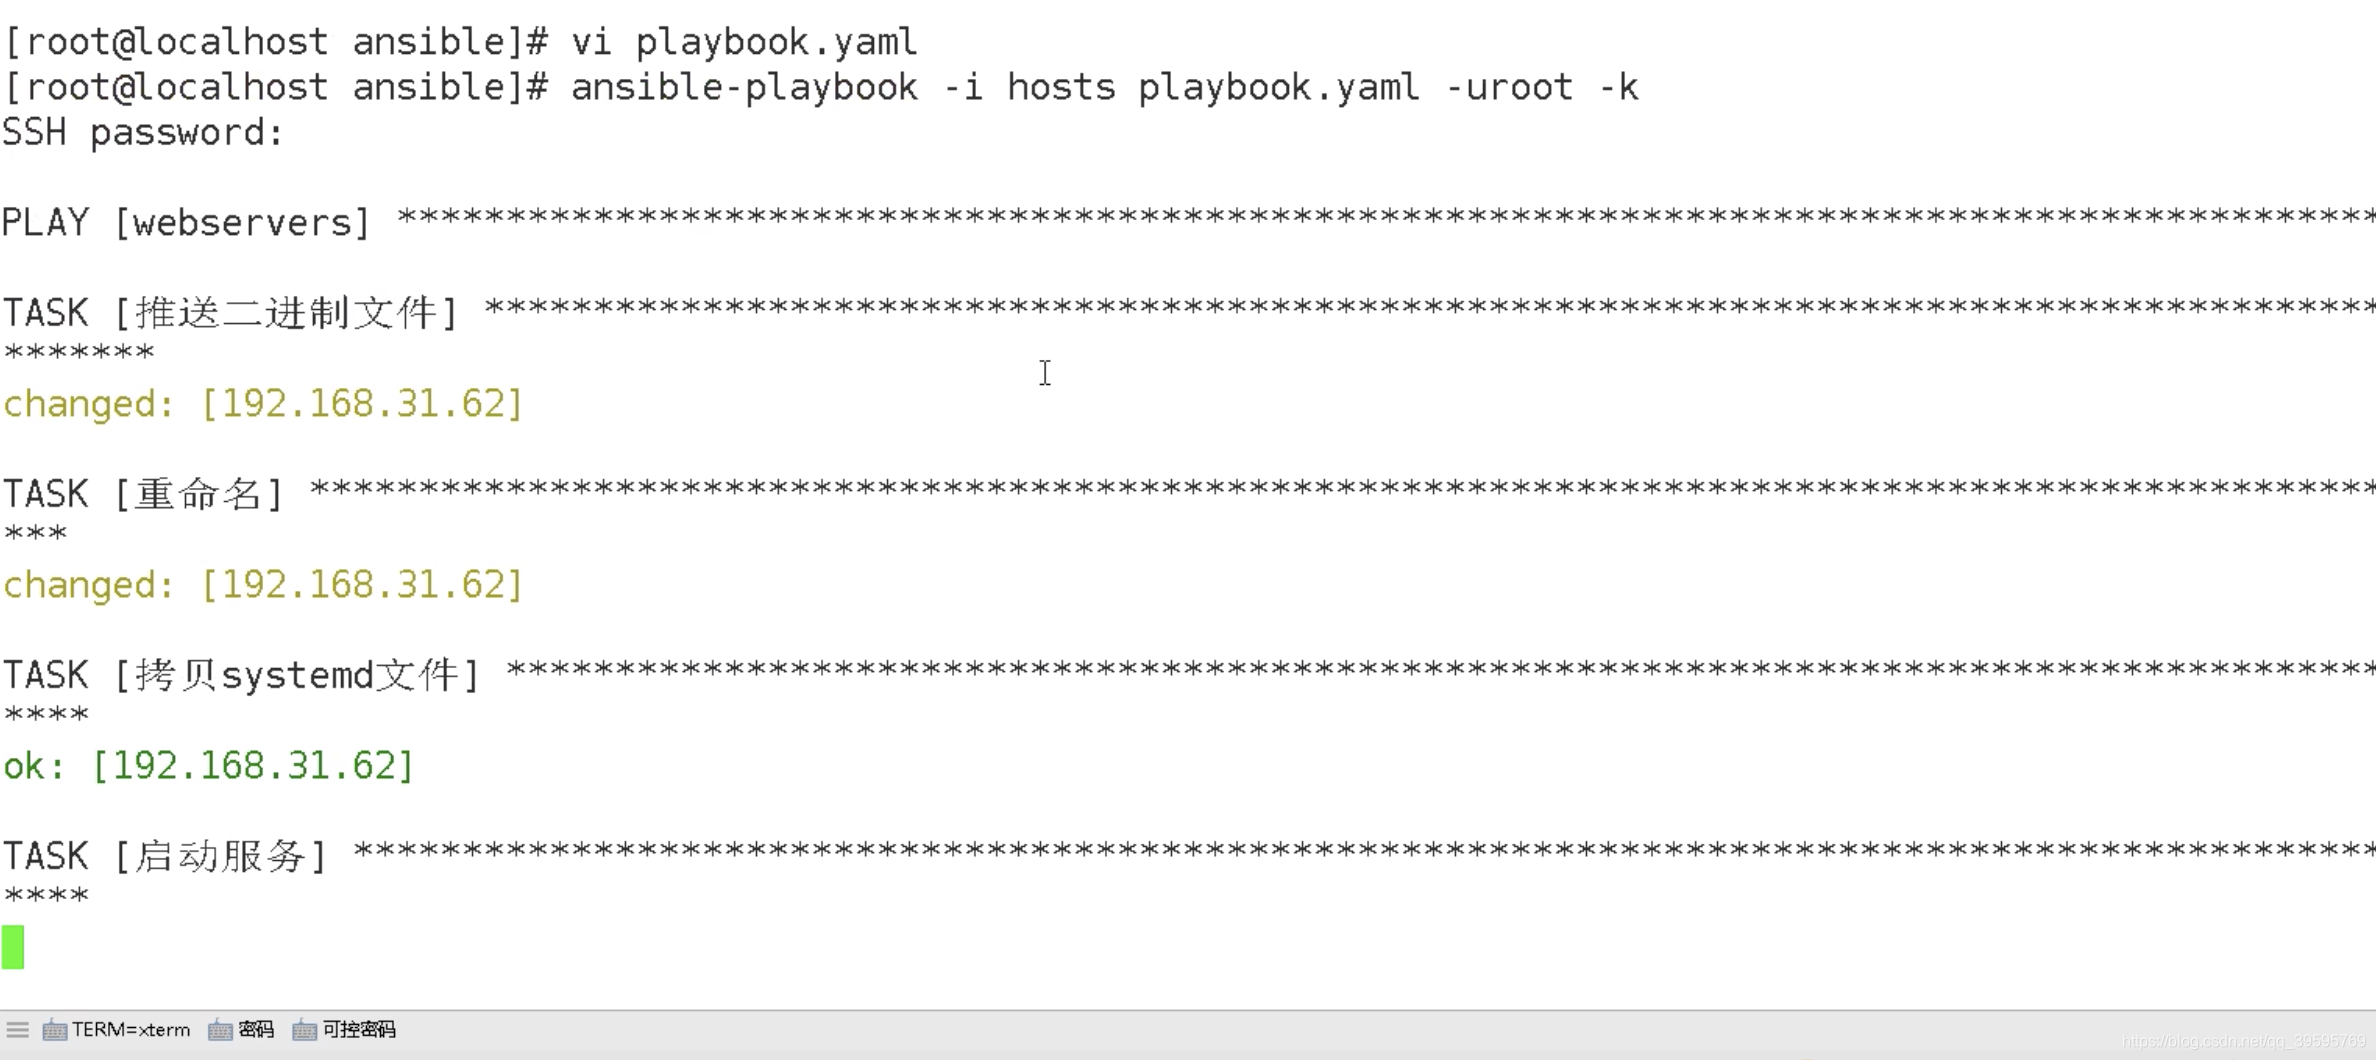
ansible-playbook -i hosts playbook.yaml -uroot -k 

失败是因为需要输入用户名和密码

https://i-blog.csdnimg.cn/blog_migrate/8ac87a21c5ad9a81ebaadb24be2e7eff.png

https://i-blog.csdnimg.cn/blog_migrate/e3524cca18892b479f0e37b47d41e99d.png

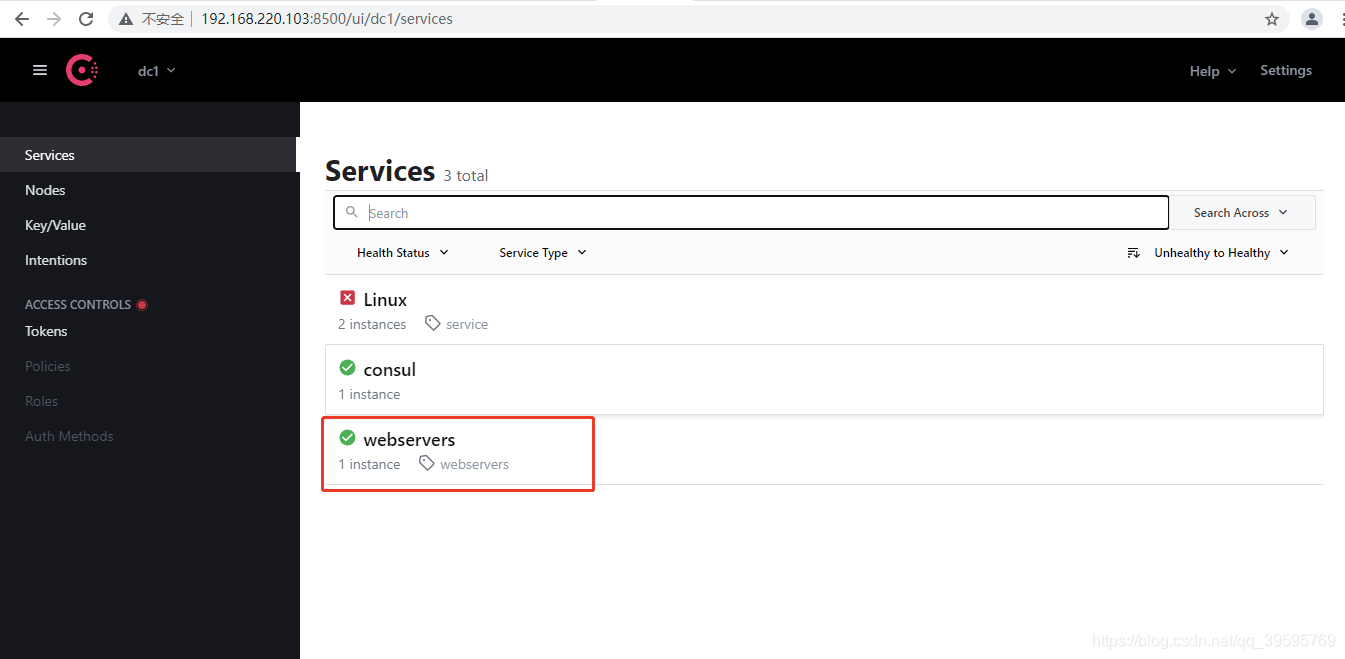
成功的标志:

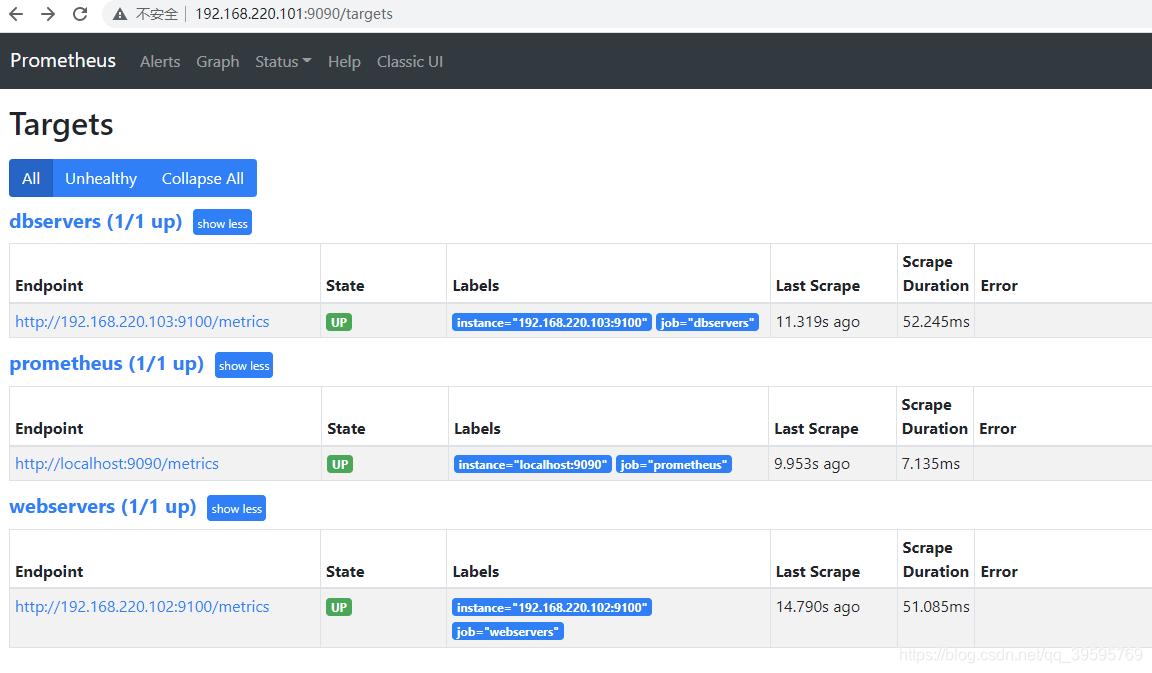
1.Prometheus中的Target有webservers服务。
2.consul中的Services多了webservers服务。
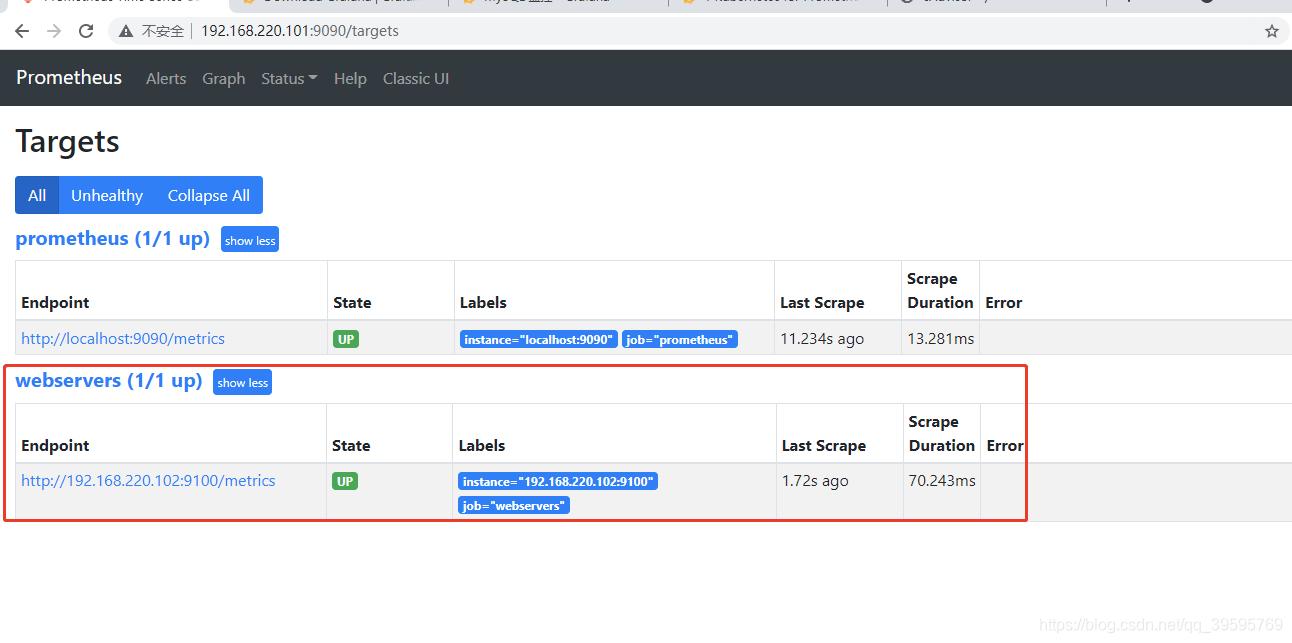
https://i-blog.csdnimg.cn/blog_migrate/0b4f0e26d90f7b9faad49a354ac7e5fc.png

https://i-blog.csdnimg.cn/blog_migrate/2c01cb0c539c031e6bef5147aa4cc7f7.png

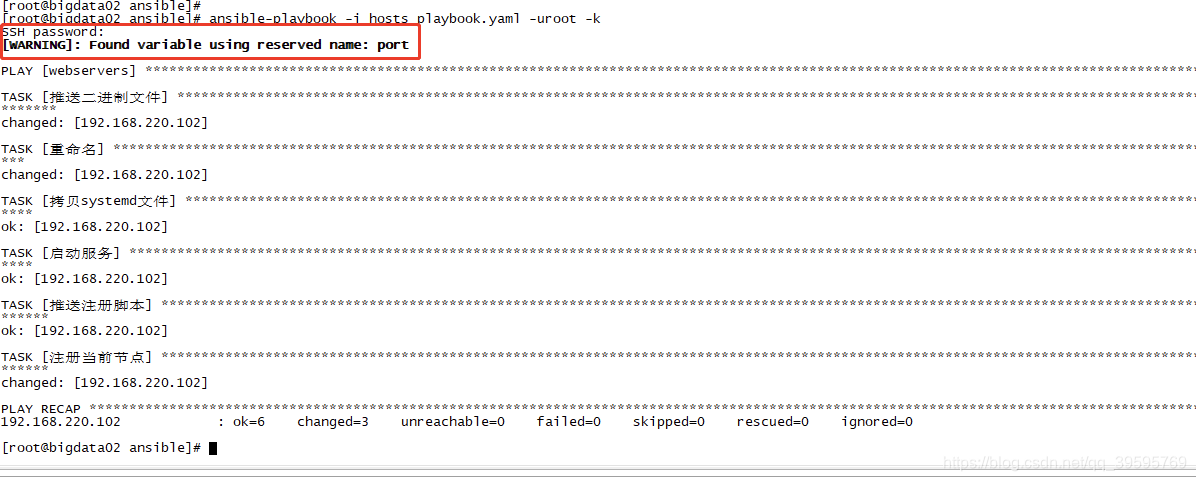
存在警告的原因是因为名字错误:port改名成exporter_port就不会有这种警告了
https://i-blog.csdnimg.cn/blog_migrate/a5cfd69b0d0a8d8fe5b6d9e95bce5262.png

修改port成exporter_port

https://i-blog.csdnimg.cn/blog_migrate/eb72bb17f6f45acab2f35c5d29db1049.png

不存在警告了

https://i-blog.csdnimg.cn/blog_migrate/78322de3e2324897ca89a5a6af3f0dee.png

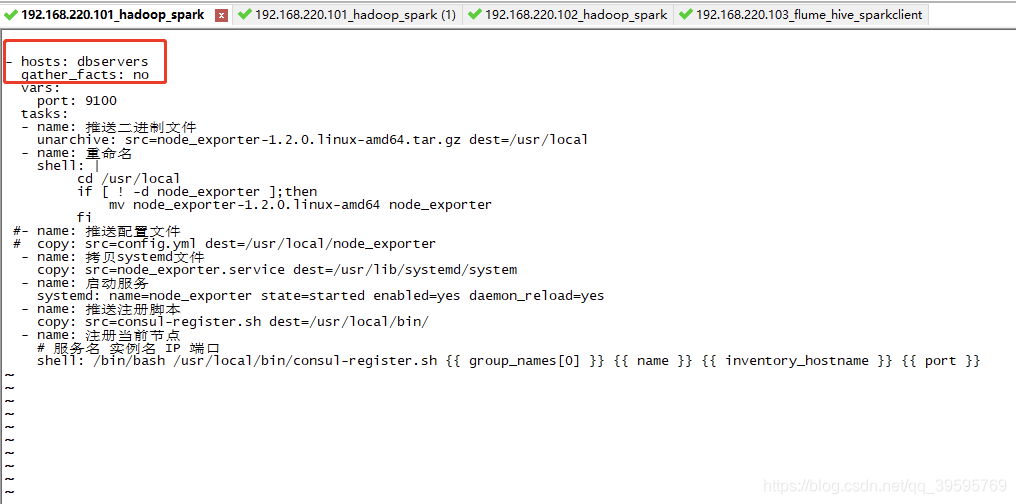
监控好了webservers组后,可以监控dbservers组了

修改playbook.yaml文件
https://i-blog.csdnimg.cn/blog_migrate/6addff813078b26208992b9dfd0b3dc9.png

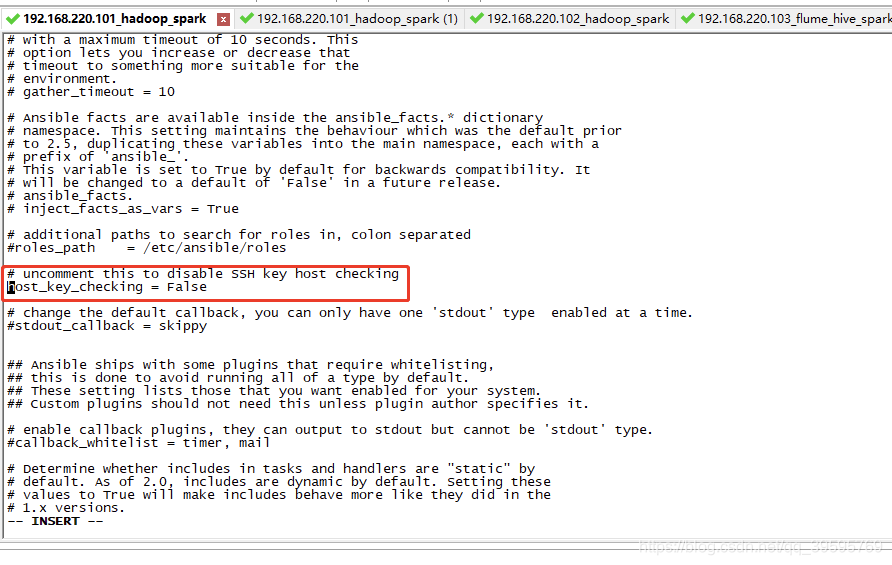
失败了,是因为第一次需要指纹验证,

https://i-blog.csdnimg.cn/blog_migrate/d40d098e5e2082d927a22d75e7bfd53f.png

https://i-blog.csdnimg.cn/blog_migrate/58a2a3663cce60b19208f1855a147e6a.png

https://i-blog.csdnimg.cn/blog_migrate/624dc942396eed6a1a7a3744baa80895.png

然后再次执行

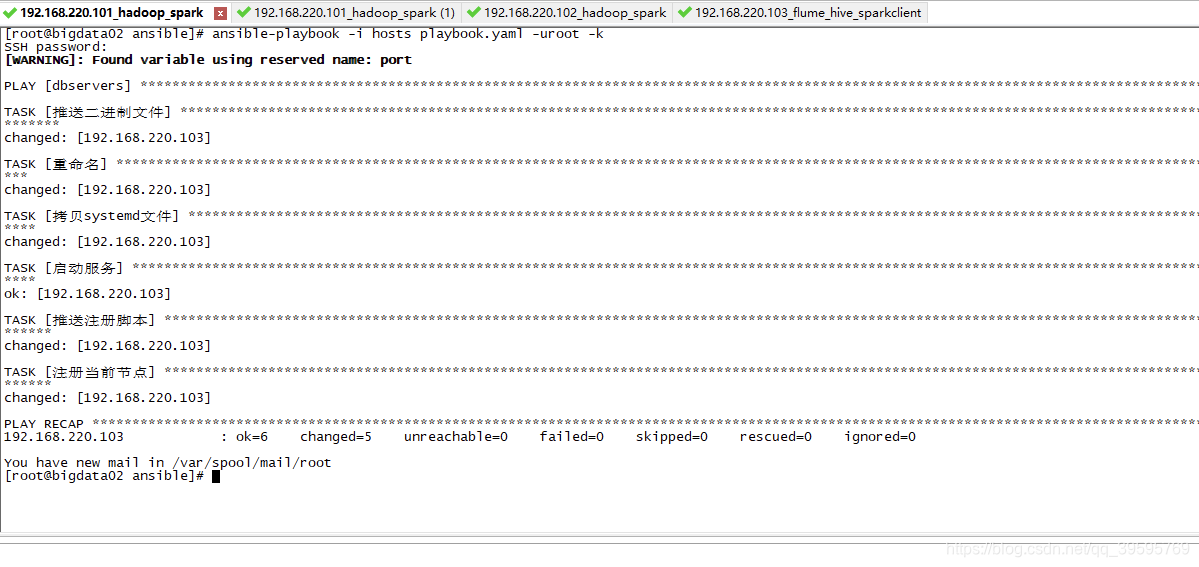
https://i-blog.csdnimg.cn/blog_migrate/89fae6559ee72f780a44dc74cf3f0a1b.png

执行成功。

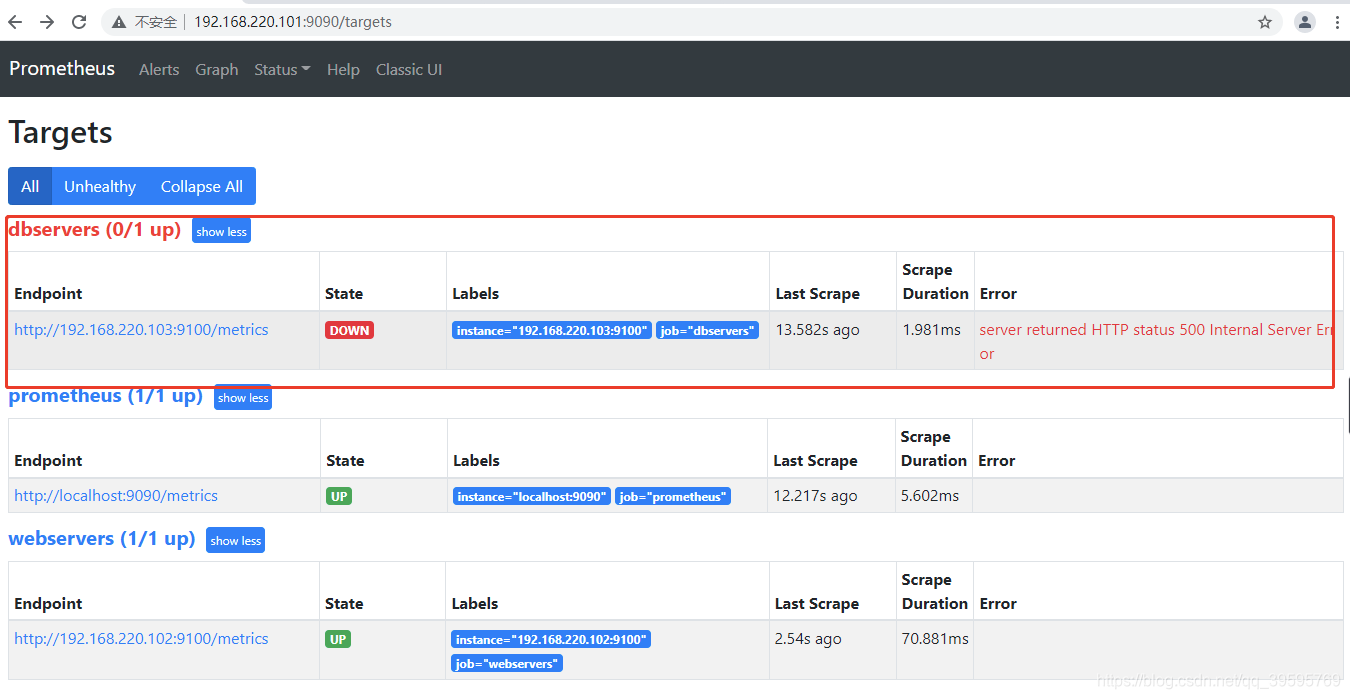
https://i-blog.csdnimg.cn/blog_migrate/512950c8a8a12b33578216d7cebe9f10.png

执行状态为Down,查看原因

https://i-blog.csdnimg.cn/blog_migrate/57fff6b2e1dbdc0cfc38323ff6ee0a74.png

https://i-blog.csdnimg.cn/blog_migrate/b34ab842e6bd04c323f6aada65d14ff5.png

状态为启动,但是web页面显示错误

https://i-blog.csdnimg.cn/blog_migrate/95a1cc81d25a8e8583809c279e374cdc.png

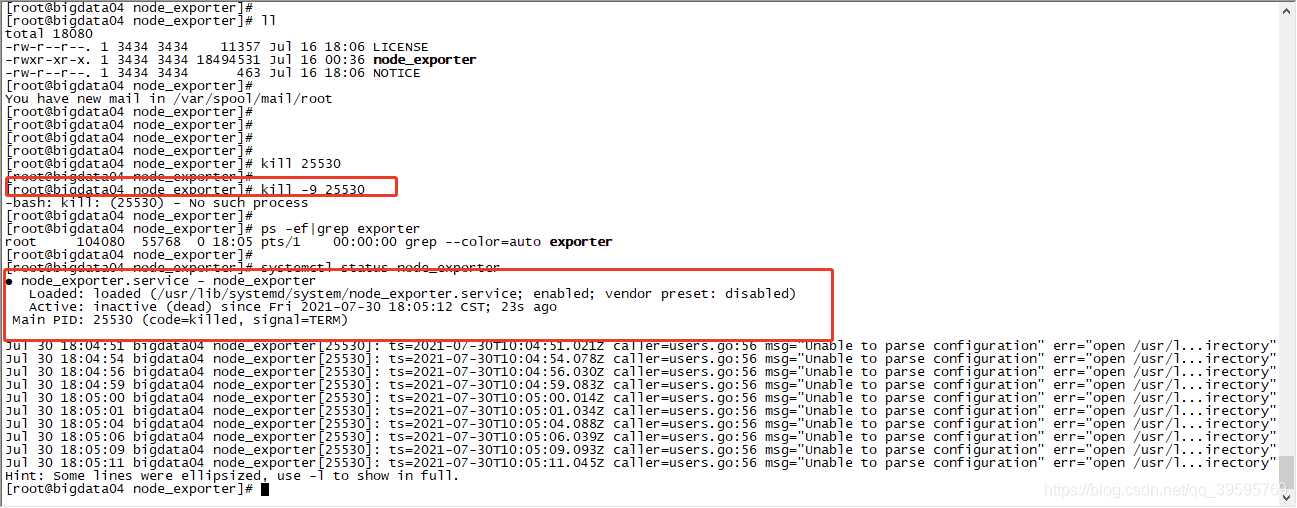
最后定位到配置文件没有拷贝过来

https://i-blog.csdnimg.cn/blog_migrate/d0476633e8d300423bb30746ef8bb33e.png

kill 掉进程后重来就可以了:

https://i-blog.csdnimg.cn/blog_migrate/bace7f1da48636386f40e9ebe8b505c1.png

https://i-blog.csdnimg.cn/blog_migrate/62e43629aaae5c5d035a0b47ce14df45.png

因此需要重新修改以下文件:

https://i-blog.csdnimg.cn/blog_migrate/2991ca8f2f8b866041d9b6f7c36153fb.png

重新来一下就可以了。

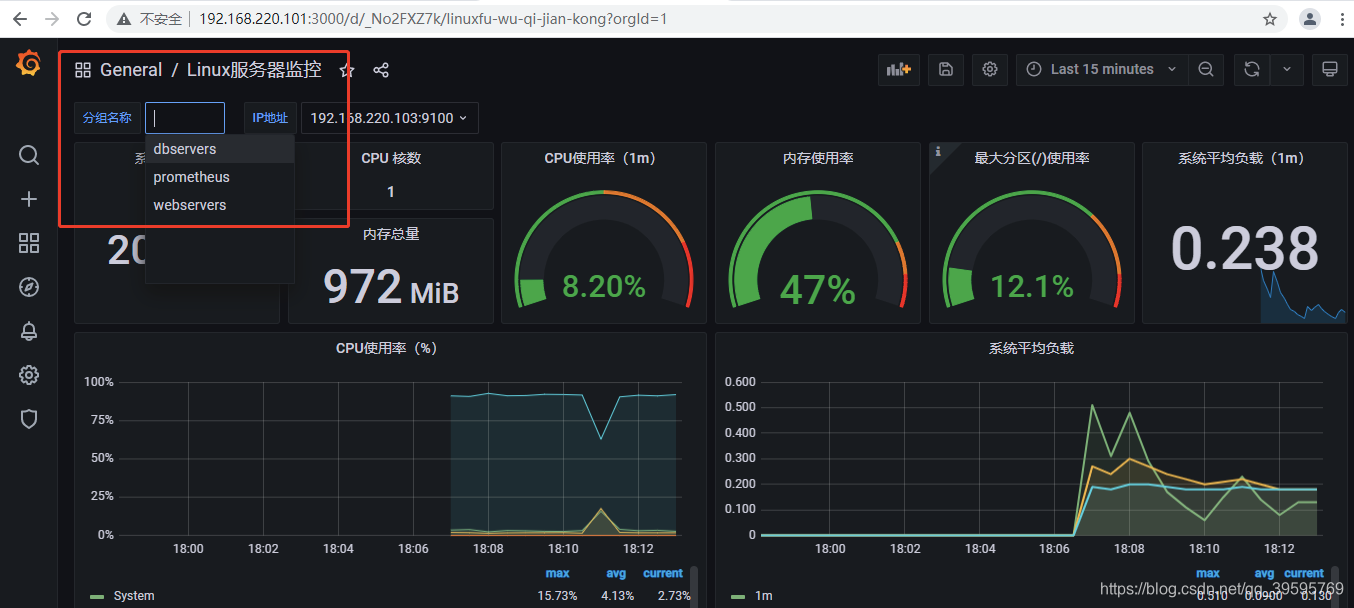
grafana也有对应的组了。

https://i-blog.csdnimg.cn/blog_migrate/40427f9a8911dc63afe869b0c5f5e97e.png

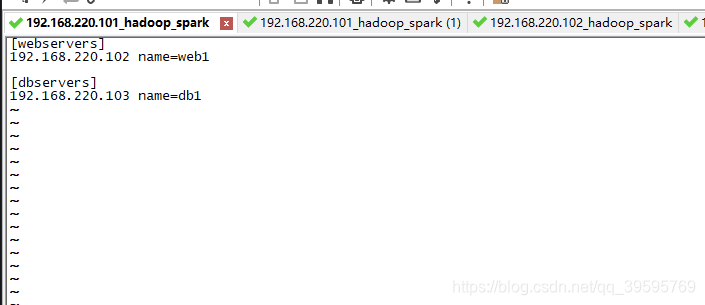
以后添加机器时只要修改hosts文件就行

https://i-blog.csdnimg.cn/blog_migrate/82b558aabbc5256d9b32d07c5fb3b967.png