Netty-NIO

目录
【Netty】- NIO
NIO:non-blocking io
三大组件
Channel & Buffer
Buffer类似内存缓冲区,暂存从Channel读取的数据,可以从 Channel 将数据读入 Buffer ,也可以将Buffer的数据写入Channel
Selector
多线程版
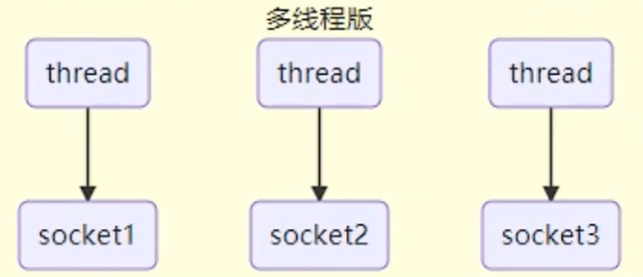
缺点:
- 内存占用高
- 线程上下文切换成本高
- 只适合连接数少的场景
线程池版

缺点:
- 阻塞模式下,线程只能处理一个socket连接
- 只适合短连接场景
Selector版
selector就是配合一个线程来管理多个channel,可以管理多个channel,获取这些channel上发生的事件,channel工作在非阻塞模式下,不会让线程吊死在一个channel上。
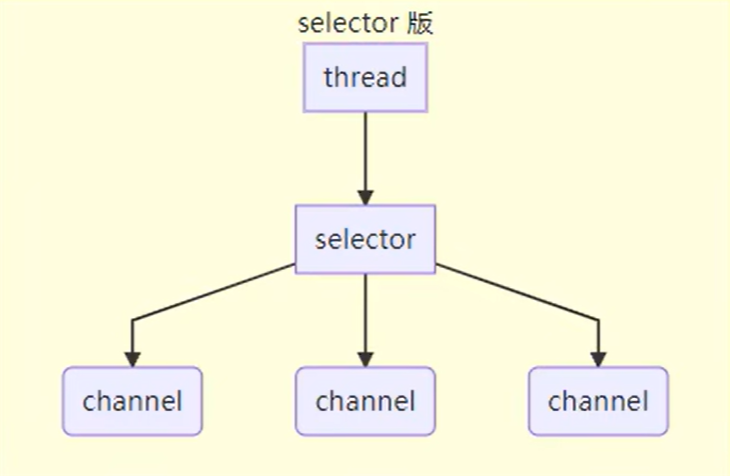
适合连接数特别多,但是流量(数据量)低的场景
ByteBuffer
使用
步骤:
- 向Buffer写入数据
- 调用flip()切换 读模式
- 从Buffer读取数据
- 调用clear() 或 compact()切换到 写模式
public static void main(String[] args) {
    // FileChannel
    // 输入输出流
    try (FileChannel channel = new FileInputStream("data.txt").getChannel()) {
        // 准备缓冲区
        ByteBuffer buffer = ByteBuffer.allocate(10); // 划分一段内存作为缓冲区
        while(true) { // 因为缓冲区只有10字节,所以需要分多次读取
            // 从 channel 读取数据,向 buffer 写入
            int len = channel.read(buffer); // 表示读到的字节数
            if(len == -1) { // 没有内容了
                break;
            }
            // 打印 buffer 的内容
            buffer.flip(); // 切换至读模式
            while(buffer.hasRemaining()) { // 是否还有剩余未读数据
                byte b = buffer.get(); // 一次读一个字节
                log.debug("实际字节 {}", (char) b);
            }
            buffer.clear(); // 切换为写模式
        }
    } catch (IOException e) {
        e.printStackTrace();
    }
}
结构
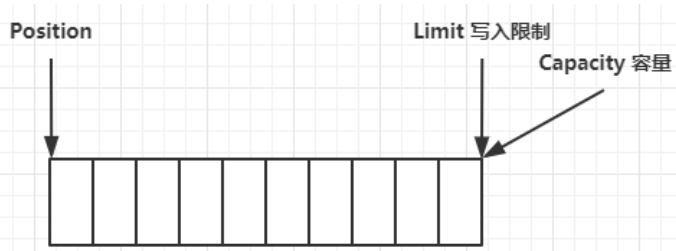
几个重要属性:
- capacity:容量(能装多少数据)
- position:读写指针(索引下标)
- limit:读写限制
初始状态:

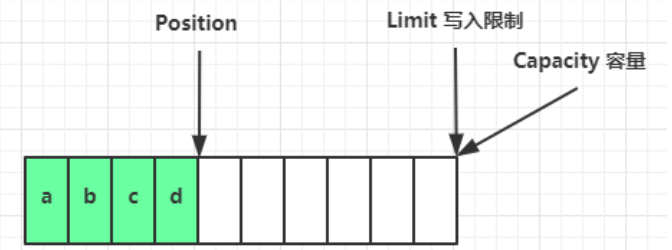
写入数据

当写了a、b、c、d数据后,position指针也会往后移动
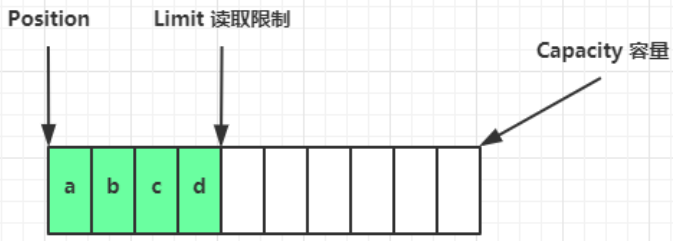
切换读模式

当切换为读模式,position指针回到最开始的状态
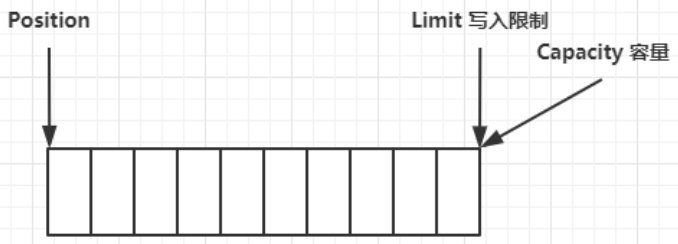
- 切换写模式
clear():直接回到开头写

compact():未读的往前移,从未读完的开始写

常见方法
- 分配空间
public static void main(String[] args) {
  	System.out.println(ByteBuffer.allocate(16).getClass()); // class java.nio.HeapByteBuffer:java 堆内存,读写效率较低,受到 GC 的影响
    System.out.println(ByteBuffer.allocateDirect(16).getClass()); // class java.nio.DirectByteBuffer:直接内存,读写效率高(少一次拷贝),不会受 GC 影响,分配的效率低
}- 写入数据
- 调用channel的read方法
int readBytes = channel.read(buf);- 调用buffer的put方法
buffer.put((byte)127);- 读取数据
- 调用channel的write方法
int writeBytes = channel.write(buf);- 调用buffer自己的get方法
byte b = buffer.get(); // 一次读取1个字节
buffer.get(new byte[4]); // 一次读取4个字节
可以通过rewind从头开始读
mark() + reset():
通过mark()做标记
通过reset()将position重置到mark()做标记的位置
- 字符串和ByteBuffer互相转换
public static void main(String[] args) {
    // 1. 字符串转为 ByteBuffer
    ByteBuffer buffer1 = ByteBuffer.allocate(16);
    buffer1.put("hello".getBytes());
    debugAll(buffer1);

    // 2. Charset
    ByteBuffer buffer2 = StandardCharsets.UTF_8.encode("hello");
    debugAll(buffer2);

    // 3. wrap
    ByteBuffer buffer3 = ByteBuffer.wrap("hello".getBytes());
    debugAll(buffer3);

    // 4. 转为字符串
    String str1 = StandardCharsets.UTF_8.decode(buffer2).toString();
    System.out.println(str1);

    buffer1.flip(); // 如果是第一种方式,需要先切换到读模式,再转换
    String str2 = StandardCharsets.UTF_8.decode(buffer1).toString();
    System.out.println(str2);
}