37.Vue3实战之商品管理wangEditor富文本插件Cascader组件分类三级联动

前言
相信 34、35 两个章节,让你对 Table 的一些变种需求有所了解,实际业务中常遇到的问题都已经介绍了。你可能会说二级子路由有 menu 的情况还没讲到。作为开发人员,需要做到举一反三。35 章节虽然都是同一个 menu 上操作,你可以将对应的二级路径写在 menu 菜单上便可。
本章节我们对商品管理进行分析讲解,涉及到的知识点如下所示:
-
需要注册的组件:
ElCascader、ElRadioGroup、ElRadio。 -
添加商品表单验证。
-
富文本编辑器 wangEditor 的使用。
需求分析
我们对本章节的需求进行简单分析,首先是商品列表页,如下所示:
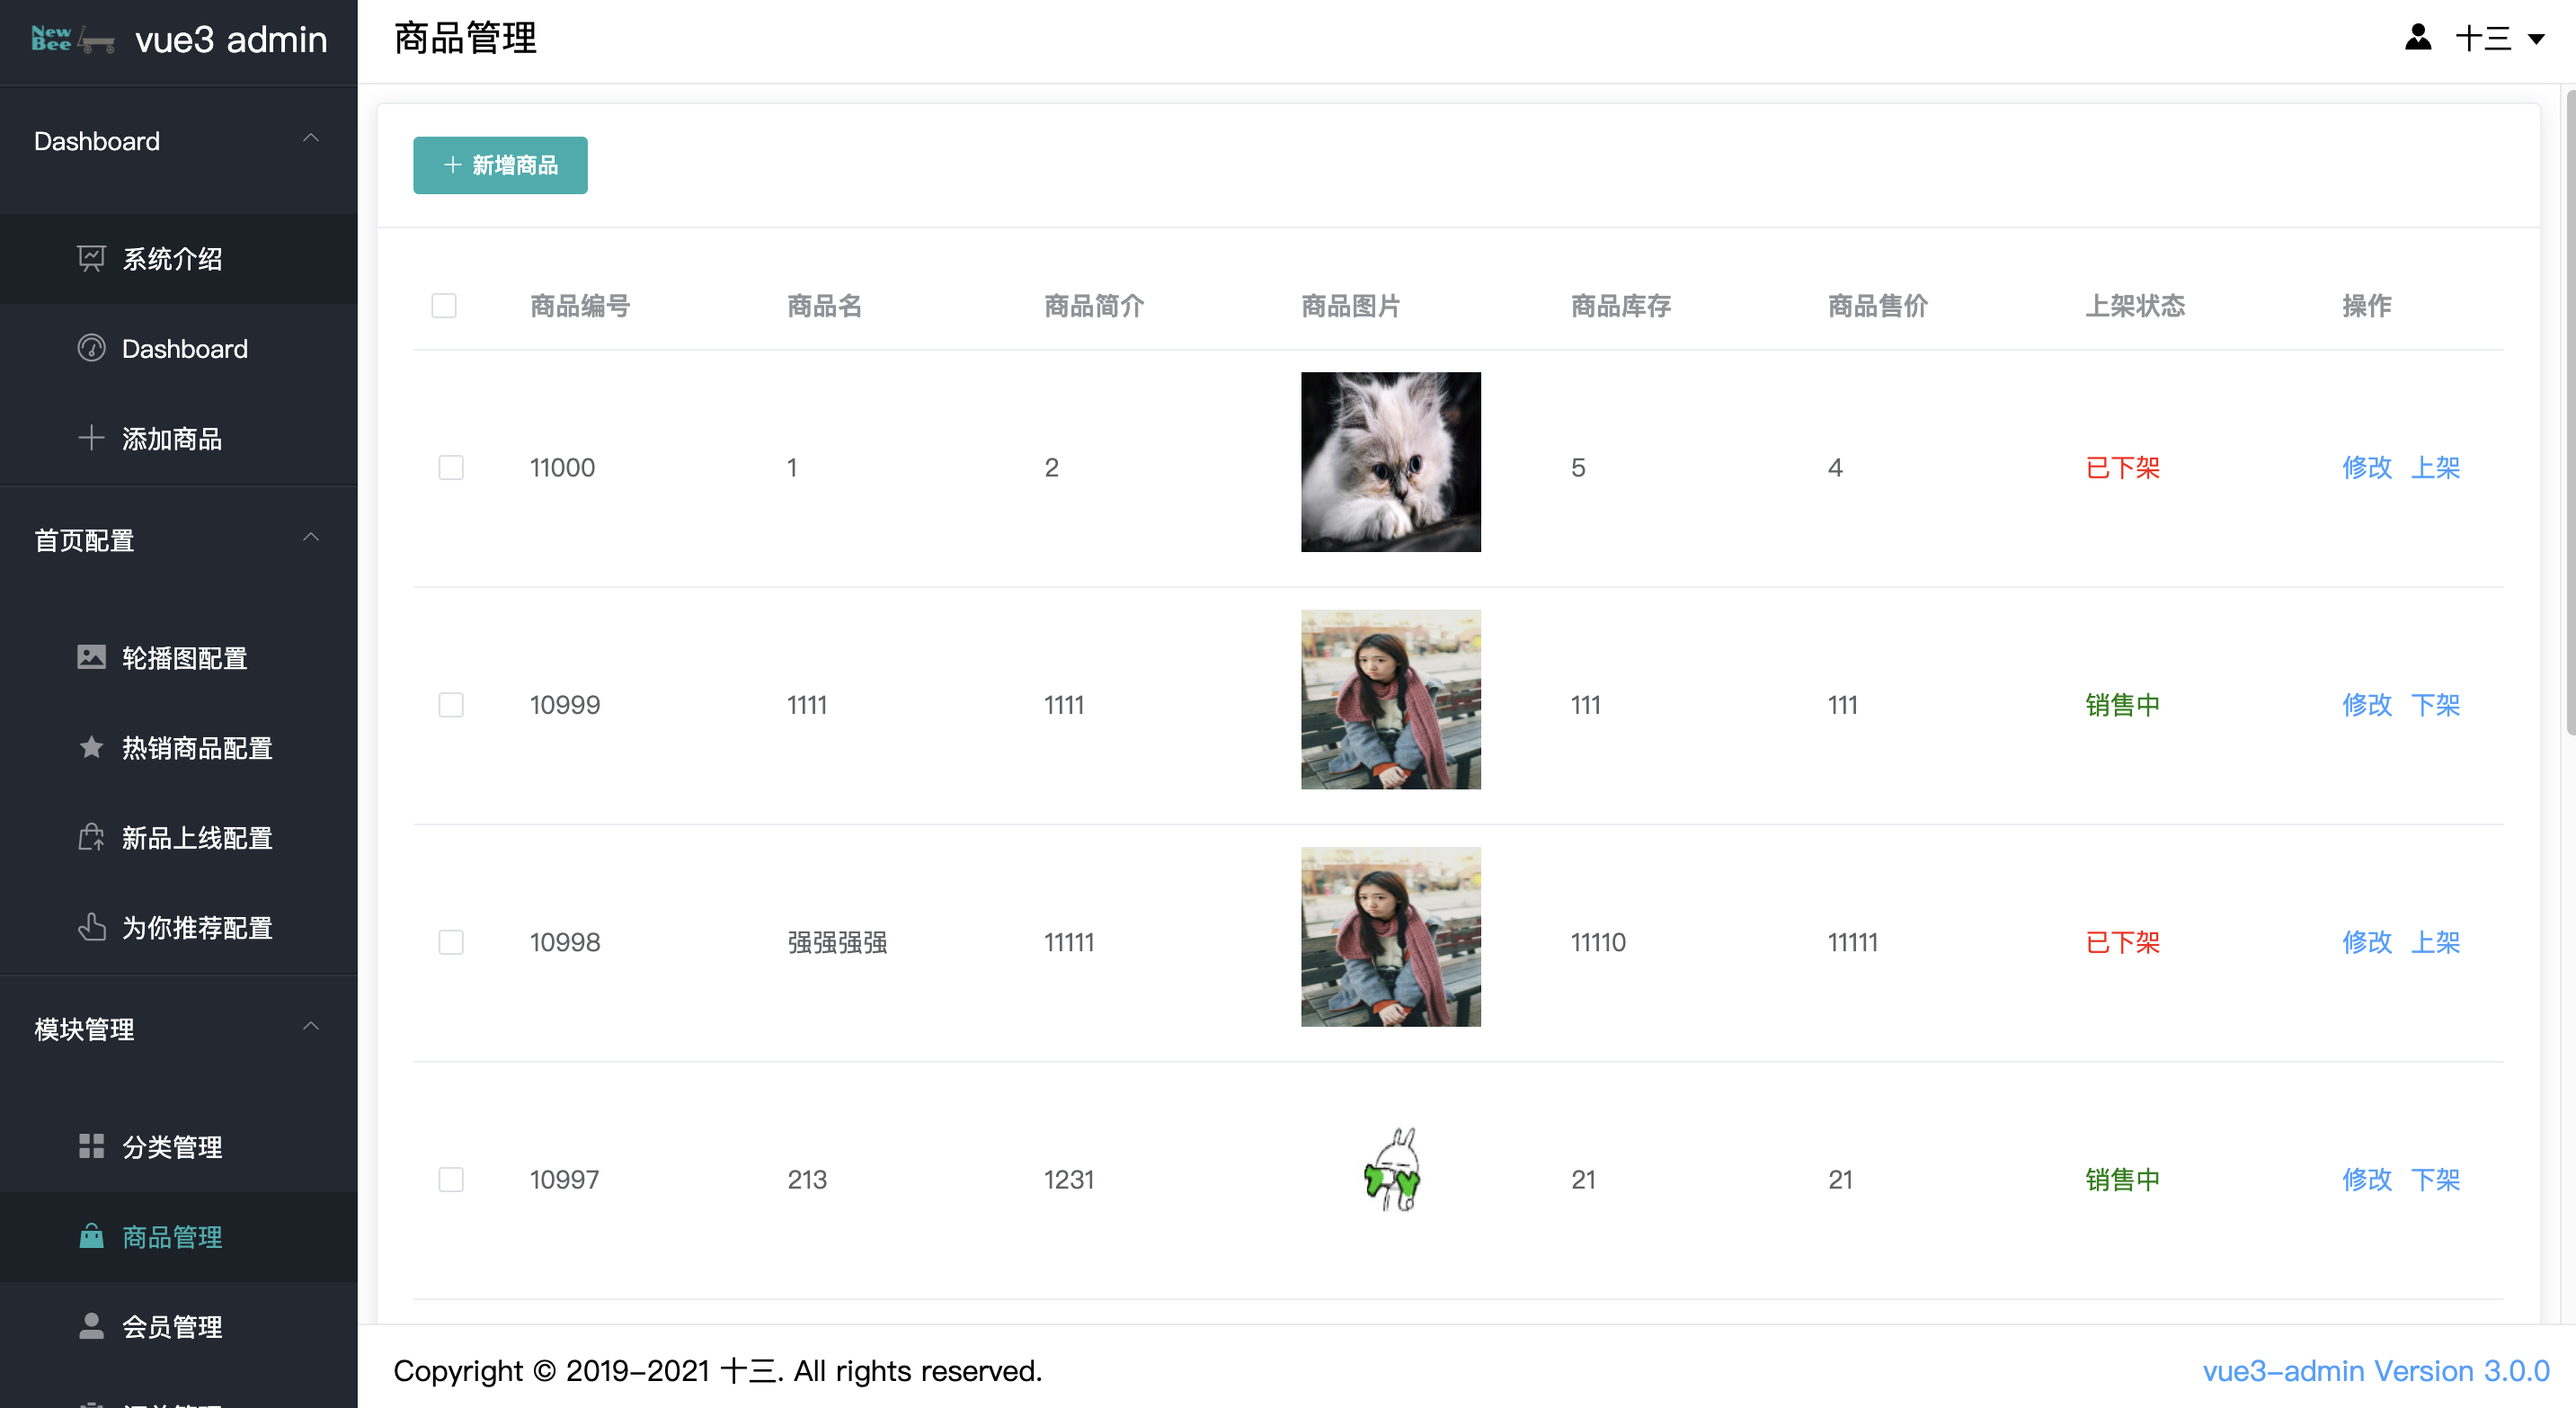
其次我们点击新增商品按钮,需要跳转到「添加商品」菜单栏,自然是展示一个添加商品的表单页面,表单样式如下:

表单内涉及到的内容也基本涵盖了正常业务开发的范畴,如三级联动(动态获取)、文本输入框、数字输入框、Radio 选项、图片上传、富文本编辑。
商品列表页
我的开发习惯一般是先开发列表页,再开发列表页的各个操作,如增加、修改、删除、查询。
首先,把列表页面敲出来,前往 App.vue 添加菜单栏,代码如下:
<el-menu-item index="/good"><el-icon><Goods /></el-icon>商品管理</el-menu-item>然后在 views 文件夹下下新建 Good.vue 文件,添加模板内容:
template
<template>
  <el-card class="swiper-container">
    <template #header>
      <div class="header">
        <el-button type="primary" :icon="Plus" @click="handleAdd">新增商品</el-button>
      </div>
    </template>
    <el-table
      :load="state.loading"
      :data="state.tableData"
      tooltip-effect="dark"
      style="width: 100%"
    >
      <el-table-column
        prop="goodsId"
        label="商品编号"
      >
      </el-table-column>
      <el-table-column
        prop="goodsName"
        label="商品名"
      >
      </el-table-column>
      <el-table-column
        prop="goodsIntro"
        label="商品简介"
      >
      </el-table-column>
      <el-table-column
        label="商品图片"
        width="150px"
      >
        <template #default="scope">
          <img style="width: 100px; height: 100px;" :key="scope.row.goodsId" :src="$filters.prefix(scope.row.goodsCoverImg)" alt="商品主图">
        </template>
      </el-table-column>
      <el-table-column
        prop="stockNum"
        label="商品库存"
      >
      </el-table-column>
      <el-table-column
        prop="sellingPrice"
        label="商品售价"
      >
      </el-table-column>
      <el-table-column
        label="上架状态"
      >
        <template #default="scope">
          <span style="color: green;" v-if="scope.row.goodsSellStatus == 0">销售中</span>
          <span style="color: red;" v-else>已下架</span>
        </template>
      </el-table-column>

      <el-table-column
        label="操作"
        width="100"
      >
        <template #default="scope">
          <a style="cursor: pointer; margin-right: 10px" @click="handleEdit(scope.row.goodsId)">修改</a>
          <a style="cursor: pointer; margin-right: 10px" v-if="scope.row.goodsSellStatus == 0" @click="handleStatus(scope.row.goodsId, 1)">下架</a>
          <a style="cursor: pointer; margin-right: 10px" v-else @click="handleStatus(scope.row.goodsId, 0)">上架</a>
        </template>
      </el-table-column>
    </el-table>
    <!--总数超过一页,再展示分页器-->
    <el-pagination
      background
      layout="prev, pager, next"
      :total="state.total"
      :page-size="state.pageSize"
      :current-page="state.currentPage"
      @current-change="changePage"
    />
  </el-card>
</template>
大家可能会问,上述的 $filters.prefix 是哪来的,作用是什么?
其实开发过程中,很多工具都需要全局设置,方便直接在 template 模板内引用。比如上述商品主图,可能会返回一些绝对路径,导致图片加载失败。所以我们需要在 main.js 下,声明一个全局方法,代码如下所示:
// main.js
// 全局方法
app.config.globalProperties.$filters = {
  prefix(url) {
    if (url && url.startsWith('http')) {
      // 当 url 以 http 开头时候,我们返回原路径
      return url
    } else {
      // 否则,我们给路径添加 host,如下
      url = `http://backend-api-02.newbee.ltd${url}`
      return url
    }
  }
}
在模板中直接通过 $filters.prefix 使用便可。
上述模板结构,我们继续用 el-card 组件对页面进行包裹,结构还是 el-card 内添加 #header 具名插槽,再添加 el-table 组件编写列表,最后加上分页组件 el-pagination。
大家发现一个规律了吗?很多页面都采用了上述的布局结构,也就是说产生了共同点,有心的同学,在课后可以自己对这部分的结构进行组件的抽离,包括获取列表的方法,筛选条件等。这里考虑到同学们学习的顺畅性,就不对这部分内容进行抽离,如果有想了解这块内容的同学,可以在小册的交流群内进行讨论。
这里我再次强调一下,el-table 的数据 load 属性从之前的 v-loading 变为 :load,在这里我踩了大坑,调试了很久才发现 element-plus 版本更新后,居然出现了这个问题。
接下来,在代码中添加相应的逻辑:
script
<script setup>
import { onMounted, reactive, ref } from 'vue'
import axios from '@/utils/axios'
import { ElMessage } from 'element-plus'
import { useRouter } from 'vue-router'

const router = useRouter() // 获取路由实例,内涵路由相关的各种方法。
const state = reactive({
  loading: false, // 列表数据接口返回前的 loadinig
  tableData: [], // 数据列表
  total: 0, // 总条数
  currentPage: 1, // 当前页
  pageSize: 10 // 分页大小
})
// 初始化钩子函数
onMounted(() => {
  getGoodList()
})
// 获取轮播图列表
const getGoodList = () => {
  state.loading = true
  axios.get('/goods/list', {
    params: {
      pageNumber: state.currentPage, // 当前页
      pageSize: state.pageSize, // 每页数量
    }
  }).then(res => {
    state.tableData = res.list // 列表数据
    state.total = res.totalCount // 数据总条数
    state.currentPage = res.currPage // 当前页
    state.loading = false // 数据成功返回后,将列表 loading 清除
  })
}
// 添加商品,跳转到 /add 路径下
const handleAdd = () => {
  router.push({ path: '/add' })
}
// 编辑商品,带 id 跳转 /add 路径
const handleEdit = (id) => {
  router.push({ path: '/add', query: { id } })
}
// 翻页方法
const changePage = (val) => {
  state.currentPage = val
  getGoodList()
}
// 上下架方法
const handleStatus = (id, status) => {
  axios.put(`/goods/status/${status}`, {
    ids: id ? [id] : []
  }).then(() => {
    ElMessage.success('修改成功')
    getGoodList()
  })
}
</script>
列表数据可能有点多,在此为大家一一对照着解释一下数据对应表:
{
  createTime: "2021-04-17 16:42:43", // 创建时间
  goodsCarousel: "/admin/dist/img/no-img.png", // 商品轮播图
  goodsCategoryId: 182, // 商品分类 id
  goodsCoverImg: "http://backend-api-02.newbee.ltd/upload/20210417_1642416.jpg", // 商品主图
  goodsDetailContent: null, // 详情内容
  goodsId: 11000, // 商品 id
  goodsIntro: "2",
  goodsName: "1", // 商品名称
  goodsSellStatus: 1, // 商品上下架状态,0:下架,1:上架
  originalPrice: 3, // 商品原价
  sellingPrice: 4, // 商品售价
  stockNum: 5, // 商品库存
  tag: "6", // 标签
  updateTime: "2021-04-18 10:51:53", // 更新时间
}
根据上述描述,对照着 template 下 el-table-column 的属性输出,prop 默认对照这上述属性。默认不自定义,输出上述原始值。如果需要自定义的同学请使用 <template #default="scope"> 在次插槽内部进行自定义操作。
最后千万千万别忘记前往 router/index.js 去添加路由配置,代码如下:
import Good from '@/views/Good.vue'
{
  path: '/good',
  name: 'good',
  component: Good
},
在 utils/index.js 文件中添加头部信息:
export const pathMap = {
  index: '首页',
  login: '登录',
  add: '添加商品',
  swiper: '轮播图配置',
  hot: '热销商品配置',
  new: '新品上线配置',
  recommend: '为你推荐配置',
  category: '分类管理',
  level2: '分类二级管理',
  level3: '分类三级管理',
  good: '商品管理',
一顿操作之后,我们观察浏览器展示情况:
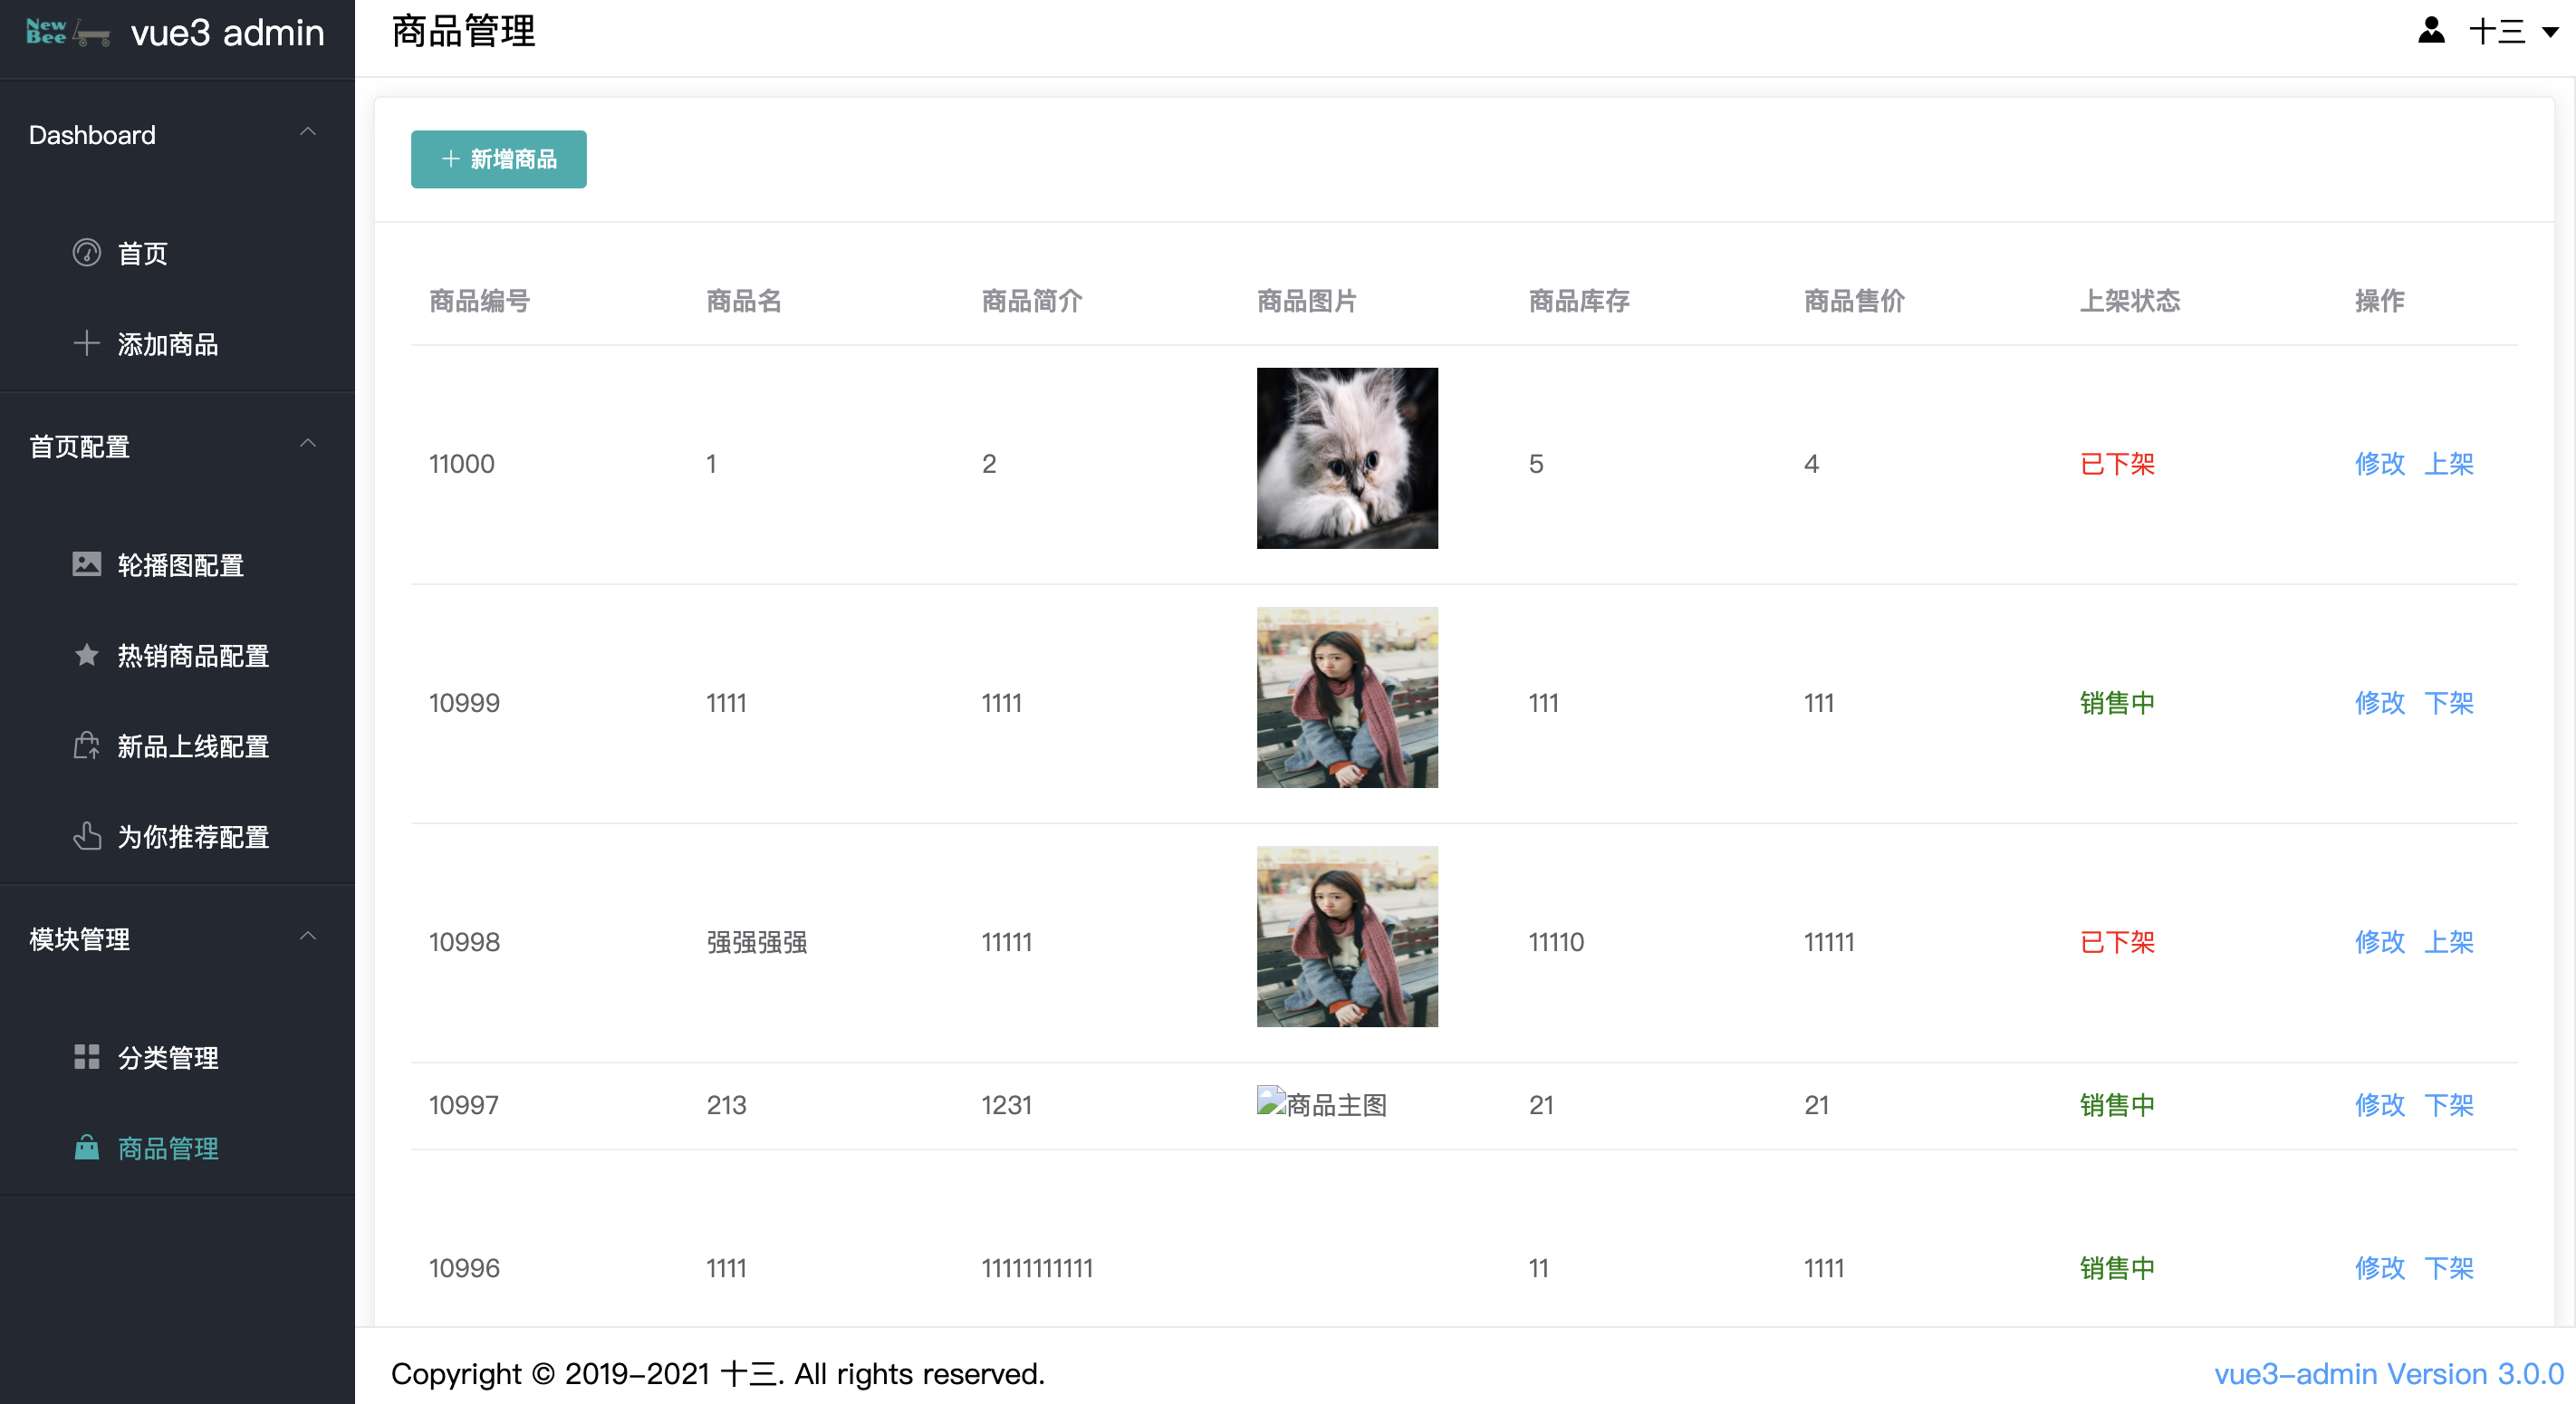
当列表长了之后,我发现一个问题。列表滚动到底部的时候,点击翻页按钮进入下一个,但是滚动条却没有滚动到顶部,这很影响开发体验,于是我想每次翻页的时候,页面滚回顶部。
我们回忆一下之前在布局的时候,是不是将右边栏的高度固定,超出部分采用滚动条的形式。大型挖坟现场:

红色内容部分为 class 为 main 的 div,我们来看看给了什么样式:

height = 屏幕的高度 - (头部的高度 + 底部的高度),并且给了 overflow 设置滚动。
可以在每次点击分页的时候,拿到 main 的 DOM 节点,设置它的 scrollTop 值为 0,让其滚动条滚回顶部。我们来这是一个全局公用方法如下所示:
// main.js
app.config.globalProperties.goTop = function () {
  const main = document.querySelector('.main')
  main.scrollTop = 0
}
受用方法:
<script setup>
+ import { getCurrentInstance } from 'vue'

const app = getCurrentInstance()
const { goTop } = app.appContext.config.globalProperties
...
// 获取轮播图列表
const getGoodList = () => {
  state.loading = true
  axios.get('/goods/list', {
    params: {
      pageNumber: state.currentPage,
      pageSize: state.pageSize
    }
  }).then(res => {
    state.tableData = res.list
    state.total = res.totalCount
    state.currentPage = res.currPage
    state.loading = false
+      goTop && goTop() // 数据获取成功后,回到顶部
  })
}
</script>
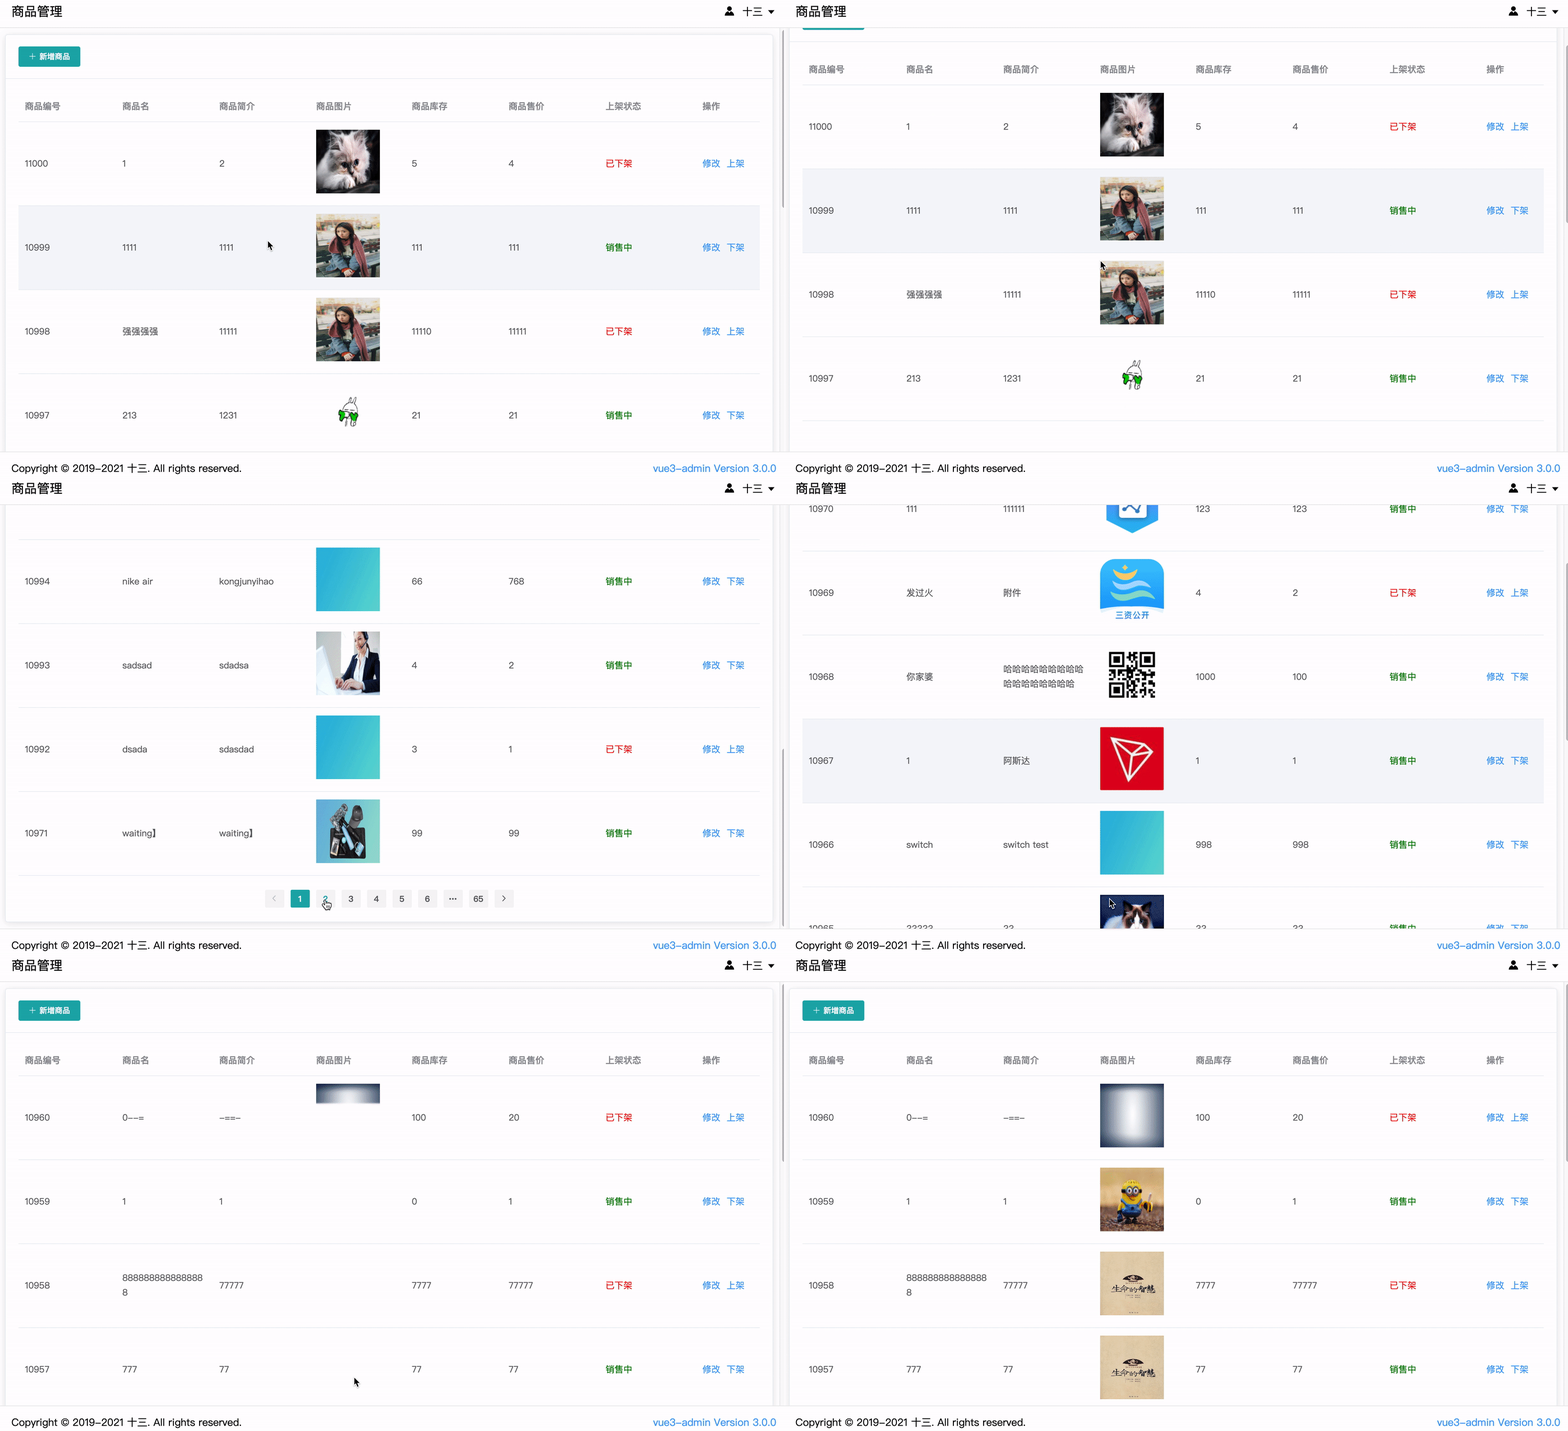
展示效果如下图所示,已经达到了想要的结果。
列表页的制作到这里差不多结束了,接下来我们添加操作部分的内容。
新增、修改商品
由于新增商品的表单内容较多,所以这里不采用弹窗的形式新增商品,转而采用跳转新页面的形式。
views 目录下已经建好了 AddGood.vue 组件,该组件便是我们实现新增商品的页面。
打开并添加模板,代码如下:
template
<template>
  <div class="add">
    <el-card class="add-container">
      <el-form :model="state.goodForm" :rules="state.rules" ref="goodRef" label-width="100px" class="goodForm">
        <el-form-item required label="商品分类">
          <el-cascader :placeholder="state.defaultCate" style="width: 300px" :props="state.category" @change="handleChangeCate"></el-cascader>
        </el-form-item>
        <el-form-item label="商品名称" prop="goodsName">
          <el-input style="width: 300px" v-model="state.goodForm.goodsName" placeholder="请输入商品名称"></el-input>
        </el-form-item>
        <el-form-item label="商品简介" prop="goodsIntro">
          <el-input style="width: 300px" type="textarea" v-model="state.goodForm.goodsIntro" placeholder="请输入商品简介(100字)"></el-input>
        </el-form-item>
        <el-form-item label="商品价格" prop="originalPrice">
          <el-input type="number" min="0" style="width: 300px" v-model="state.goodForm.originalPrice" placeholder="请输入商品价格"></el-input>
        </el-form-item>
        <el-form-item label="商品售卖价" prop="sellingPrice">
          <el-input type="number" min="0" style="width: 300px" v-model="state.goodForm.sellingPrice" placeholder="请输入商品售价"></el-input>
        </el-form-item>
        <el-form-item label="商品库存" prop="stockNum">
          <el-input type="number" min="0" style="width: 300px" v-model="state.goodForm.stockNum" placeholder="请输入商品库存"></el-input>
        </el-form-item>
        <el-form-item label="商品标签" prop="tag">
          <el-input style="width: 300px" v-model="state.goodForm.tag" placeholder="请输入商品小标签"></el-input>
        </el-form-item>
        <el-form-item label="上架状态" prop="goodsSellStatus">
          <el-radio-group v-model="state.goodForm.goodsSellStatus">
            <el-radio label="0">上架</el-radio>
            <el-radio label="1">下架</el-radio>
          </el-radio-group>
        </el-form-item>
        <el-form-item required label="商品主图" prop="goodsCoverImg">
          <el-upload
            class="avatar-uploader"
            :action="state.uploadImgServer"
            accept="jpg,jpeg,png"
            :headers="{
              token: token
            }"
            :show-file-list="false"
            :before-upload="handleBeforeUpload"
            :on-success="handleUrlSuccess"
          >
            <img style="width: 100px; height: 100px; border: 1px solid #e9e9e9;" v-if="state.goodForm.goodsCoverImg" :src="state.goodForm.goodsCoverImg" class="avatar">
            <el-icon v-else class="avatar-uploader-icon"><Plus /></el-icon>
          </el-upload>
        </el-form-item>
        <el-form-item label="详情内容">
          <div ref='editor'></div>
        </el-form-item>
        <el-form-item>
          <el-button type="primary" @click="submitAdd()">{{ state.id ? '立即修改' : '立即创建' }}</el-button>
        </el-form-item>
      </el-form>
    </el-card>
  </div>
</template>
这里注意,新增了 el-cascader 组件用作三级联动。:props 属性非常重要,这个在后续的逻辑添加内容上,做一个详细的分析。
详情内容给了一个 div,并且设置好了 ref,准备接入 wangEditor。
话不多说,我们添加逻辑部分:
script
<script setup>
import { reactive, ref, toRefs, onMounted, onBeforeUnmount, getCurrentInstance } from 'vue'
import WangEditor from 'wangeditor'
import axios from '@/utils/axios'
import { ElMessage } from 'element-plus'
import { useRoute, useRouter } from 'vue-router'
import { localGet, uploadImgServer, uploadImgsServer } from '@/utils'

const { proxy } = getCurrentInstance()
const editor = ref(null) // 富文本编辑器 ref
const goodRef = ref(null) // 表单 ref
const route = useRoute()
const router = useRouter()
const { id } = route.query // 编辑时传入的商品 id
const state = reactive({
  uploadImgServer, // 上传图片的接口地址,单图上传
  token: localGet('token') || '', // 存在本地的 token
  id: id,
  defaultCate: '', // 默认分类值
  goodForm: { // 商品表单内容
    goodsName: '',
    goodsIntro: '',
    originalPrice: '',
    sellingPrice: '',
    stockNum: '',
    goodsSellStatus: '0',
    goodsCoverImg: '',
    tag: ''
  },
  rules: { // 规则
    goodsName: [
      { required: 'true', message: '请填写商品名称', trigger: ['change'] }
    ],
    originalPrice: [
      { required: 'true', message: '请填写商品价格', trigger: ['change'] }
    ],
    sellingPrice: [
      { required: 'true', message: '请填写商品售价', trigger: ['change'] }
    ],
    stockNum: [
      { required: 'true', message: '请填写商品库存', trigger: ['change'] }
    ],
  },
  categoryId: '', // 分类 id
  category: { // 联动组件 props 属性
    lazy: true,
    lazyLoad(node, resolve) { // 懒加载分类方法
      const { level = 0, value } = node
      axios.get('/categories', {
        params: {
          pageNumber: 1,
          pageSize: 1000,
          categoryLevel: level + 1,
          parentId: value || 0
        }
      }).then(res => {
        const list = res.list
        const nodes = list.map(item => ({
          value: item.categoryId,
          label: item.categoryName,
          leaf: level > 1
        }))
        resolve(nodes)
      })
    }
  }
})
let instance // wangEditor 实例
onMounted(() => {
  instance = new WangEditor(editor.value) // 初始化 wangEditor
  instance.config.showLinkImg = false
  instance.config.showLinkImgAlt = false
  instance.config.showLinkImgHref = false
  instance.config.uploadImgMaxSize = 2 * 1024 * 1024 // 最大上传大小 2M
  instance.config.uploadFileName = 'file' // 上传时,key 值自定义
  instance.config.uploadImgHeaders = {
    token: state.token // 添加 token,否则没有权限调用上传接口
  }
  // 图片返回格式不同,需要自定义返回格式
  instance.config.uploadImgHooks = {
    // 图片上传并返回了结果,想要自己把图片插入到编辑器中
    // 例如服务器端返回的不是 { errno: 0, data: [...] } 这种格式,可使用 customInsert
    customInsert: function(insertImgFn, result) {
      console.log('result', result)
      // result 即服务端返回的接口
      // insertImgFn 可把图片插入到编辑器,传入图片 src ,执行函数即可
      if (result.data && result.data.length) {
        result.data.forEach(item => insertImgFn(item))
      }
    }
  }
  instance.config.uploadImgServer = uploadImgsServer // 上传接口地址配置
  Object.assign(instance.config, {
    onchange() {
      console.log('change')
    },
  })
  instance.create()
  if (id) {
    // 获取商品信息
    axios.get(`/goods/${id}`).then(res => {
      const { goods, firstCategory, secondCategory, thirdCategory } = res
      state.goodForm = {
        goodsName: goods.goodsName,
        goodsIntro: goods.goodsIntro,
        originalPrice: goods.originalPrice,
        sellingPrice: goods.sellingPrice,
        stockNum: goods.stockNum,
        goodsSellStatus: String(goods.goodsSellStatus),
        goodsCoverImg: proxy.$filters.prefix(goods.goodsCoverImg),
        tag: goods.tag
      }
      state.categoryId = goods.goodsCategoryId
      state.defaultCate = `${firstCategory.categoryName}/${secondCategory.categoryName}/${thirdCategory.categoryName}`
      if (instance) {
        // 初始化商品详情 html
        instance.txt.html(goods.goodsDetailContent)
      }
    })
  }
})
onBeforeUnmount(() => {
  // 组件销毁之前,销毁 wangEditor 实例
  instance.destroy()
  instance = null
})
// 添加商品方法
const submitAdd = () => {
  goodRef.value.validate((vaild) => {
    if (vaild) {
      // 默认新增用 post 方法
      let httpOption = axios.post
      let params = {
        goodsCategoryId: state.categoryId,
        goodsCoverImg: state.goodForm.goodsCoverImg,
        goodsDetailContent: instance.txt.html(),
        goodsIntro: state.goodForm.goodsIntro,
        goodsName: state.goodForm.goodsName,
        goodsSellStatus: state.goodForm.goodsSellStatus,
        originalPrice: state.goodForm.originalPrice,
        sellingPrice: state.goodForm.sellingPrice,
        stockNum: state.goodForm.stockNum,
        tag: state.goodForm.tag
      }
      console.log('params', params)
      if (id) {
        params.goodsId = id
        // 修改商品使用 put 方法
        httpOption = axios.put
      }
      httpOption('/goods', params).then(() => {
        ElMessage.success(id ? '修改成功' : '添加成功')
        router.push({ path: '/good' })
      })
    }
  })
}
// 上传之前,判断一下文件格式
const handleBeforeUpload = (file) => {
  const sufix = file.name.split('.')[1] || ''
  if (!['jpg', 'jpeg', 'png'].includes(sufix)) {
    ElMessage.error('请上传 jpg、jpeg、png 格式的图片')
    return false
  }
}
// 图片上传成功后的回调
const handleUrlSuccess = (val) => {
  state.goodForm.goodsCoverImg = val.data || ''
}
// 联动变化后的回调
const handleChangeCate = (val) => {
  state.categoryId = val[2] || 0
}
</script>
样式部分:
style
<style scoped>
  .add {
    display: flex;
  }
  .add-container {
    flex: 1;
    height: 100%;
  }
  .avatar-uploader {
    width: 100px;
    height: 100px;
    color: #ddd;
    font-size: 30px;
  }
  .avatar-uploader-icon {
    display: block;
    width: 100%;
    height: 100%;
    border: 1px solid #e9e9e9;
    padding: 32px 17px;
  }
</style>
逻辑部分,逐行分析了每一段代码,这里我着重讲解一下三级联动的 props 属性是咋回事。
首先我们给 :props 赋值的内容是:
category: {
  lazy: true,
  lazyLoad(node, resolve) {
    const { level = 0, value } = node
    axios.get('/categories', {
      params: {
        pageNumber: 1,
        pageSize: 1000,
        categoryLevel: level + 1,
        parentId: value || 0
      }
    }).then(res => {
      const list = res.list
      const nodes = list.map(item => ({
        value: item.categoryId,
        label: item.categoryName,
        leaf: level > 1
      }))
      resolve(nodes)
    })
  }
}-
lazy: 是否动态加载子节点,需与
lazyLoad方法结合使用。我们是接口请求的联动,所以需要设置为true。 -
lazyLoad:加载动态数据的方法,仅在 lazy 为 true 时有效。接收的类型为
function(node, resolve),node为当前点击的节点,resolve为数据加载完成的回调(必须调用)。默认第一次加载的参数level = 0, value = 0,获取categoryLevel = 1,parentId = 0的分类。当你选择某个分类的时候,会再次触发lazyLoad。此时level = 1,value = 点击的分类id,categoryLevel = 2,parentId = 点击的分类id,二级分类的值也就通过resolve(nodes)返回给el-cascader组件。
wangEditor 难得的对 Vue3 做了适配,国内的同学开源的一个富文本编辑器,官方文档在此。其实富文本编辑器的使用并不复杂,所有的内容编辑完之后,样式都会以内嵌的形式嵌入到标签里,只要将最后编辑完的内容上传给服务器,C 端可通过 v-html 直接展示详情内容。
上述要注意的是,上传图片接口,一个是支持单图,另一个是支持多图的,需要事先在 utils/index.js 里定义好,如下所示:
// 单张图片上传
export const uploadImgServer = 'http://backend-api-02.newbee.ltd/manage-api/v1/upload/file'
// 多张图片上传
export const uploadImgsServer = 'http://backend-api-02.newbee.ltd/manage-api/v1/upload/files'
没有注册的组件一定要注册好,否则组件无法展示。wangEditor 需要通过 npm 安装。
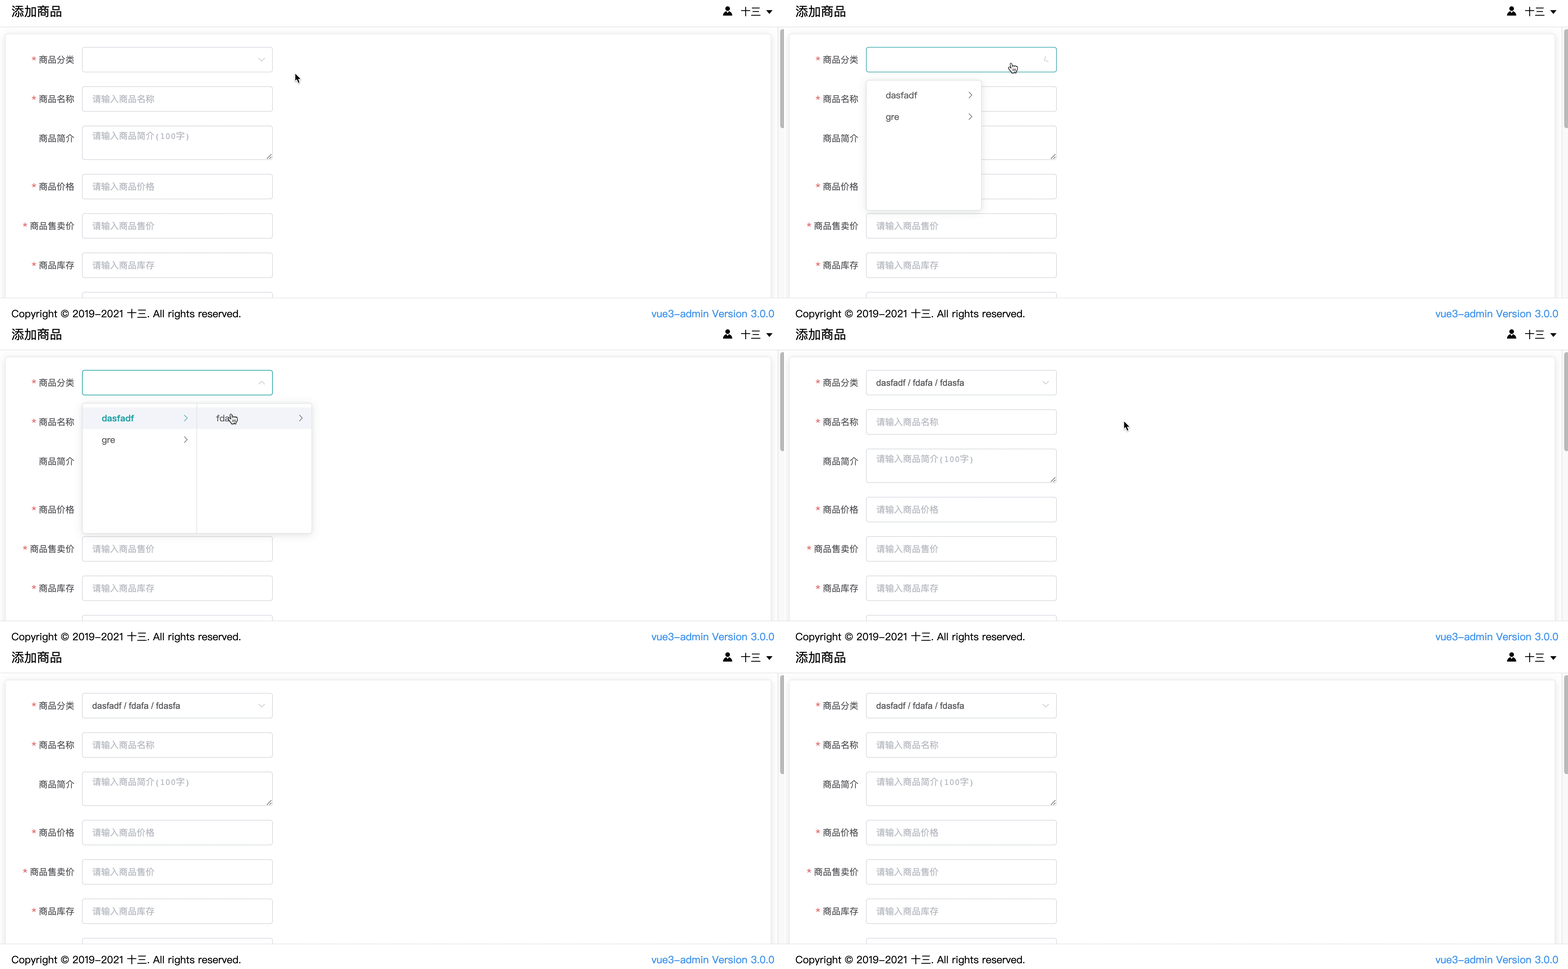
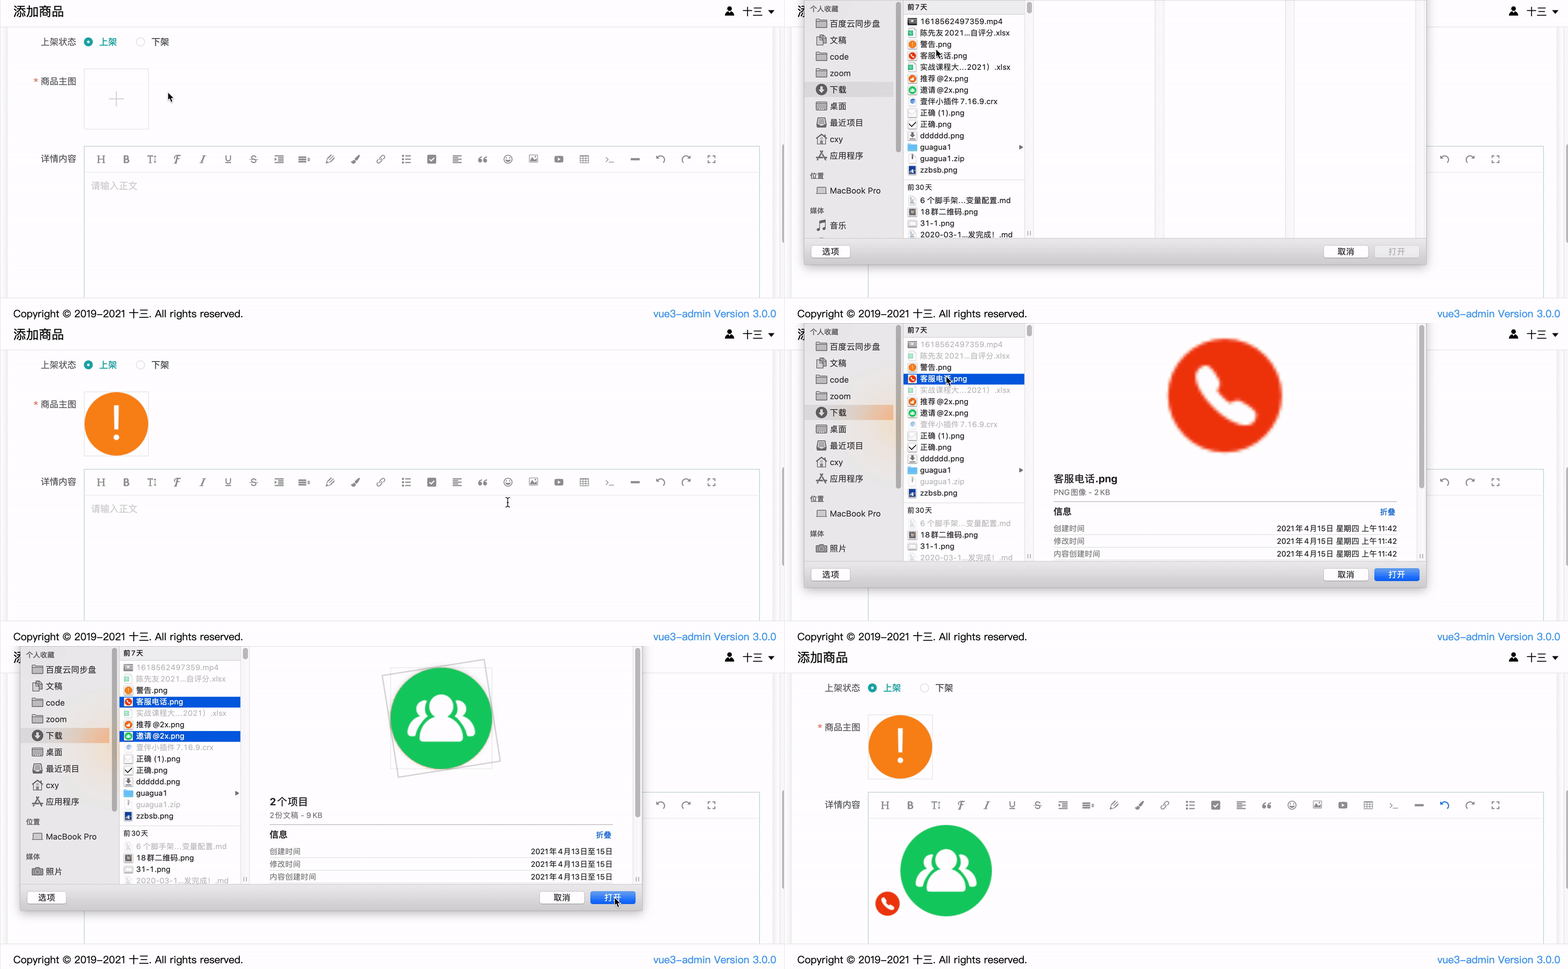
浏览器展示如下所示:
总结
本小节讲解了商品管理相关知识点,特别是这个三级联动懒加载,很考验一个开发者阅读文档的能力。有心的同学,建议自己手动实现一个三级联动选项组件,这很考验一个开发者代码功底。
本章源码地址
文档最近更新时间:2022 年 9 月 20 日。